Welcome to WebGee! This guide will walk you through the steps to set up your Cloud Server. Follow these instructions to ensure a smooth and successful setup.
1. Accessing Client Area
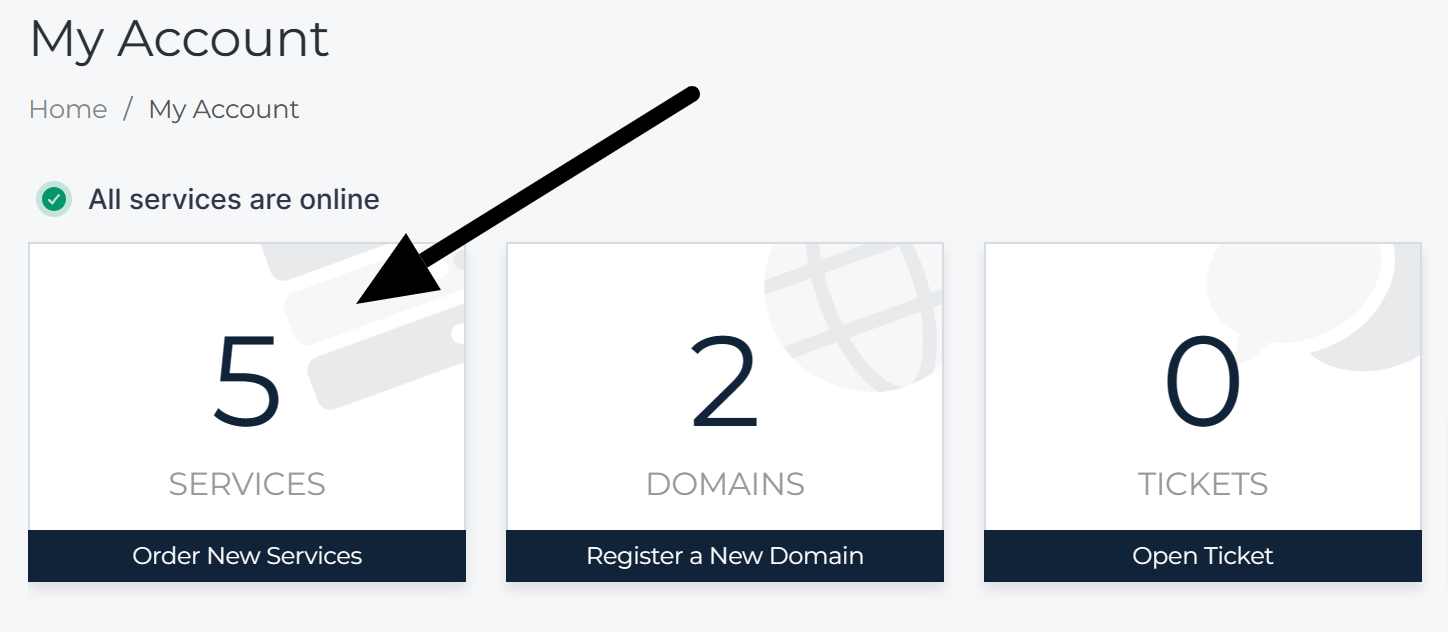
2. Navigating to Services
- Click on the "Services" tab in the main menu.
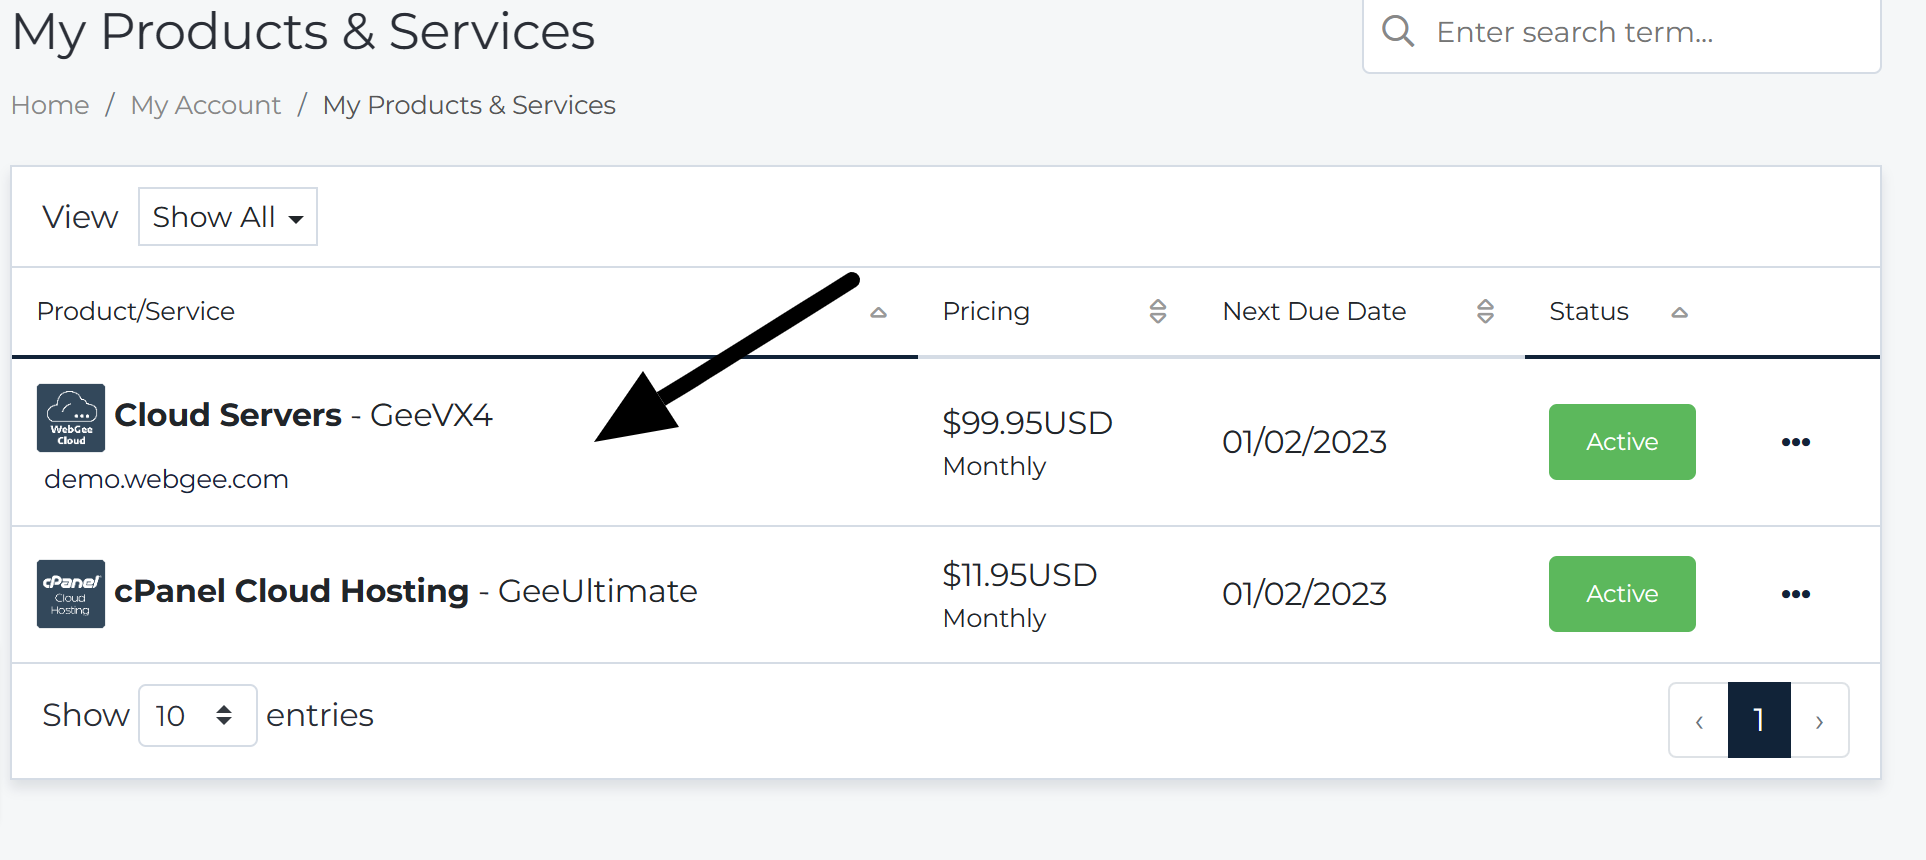
3. Selecting Your Server
- Under "My Products & Services," locate and select your Cloud Server.
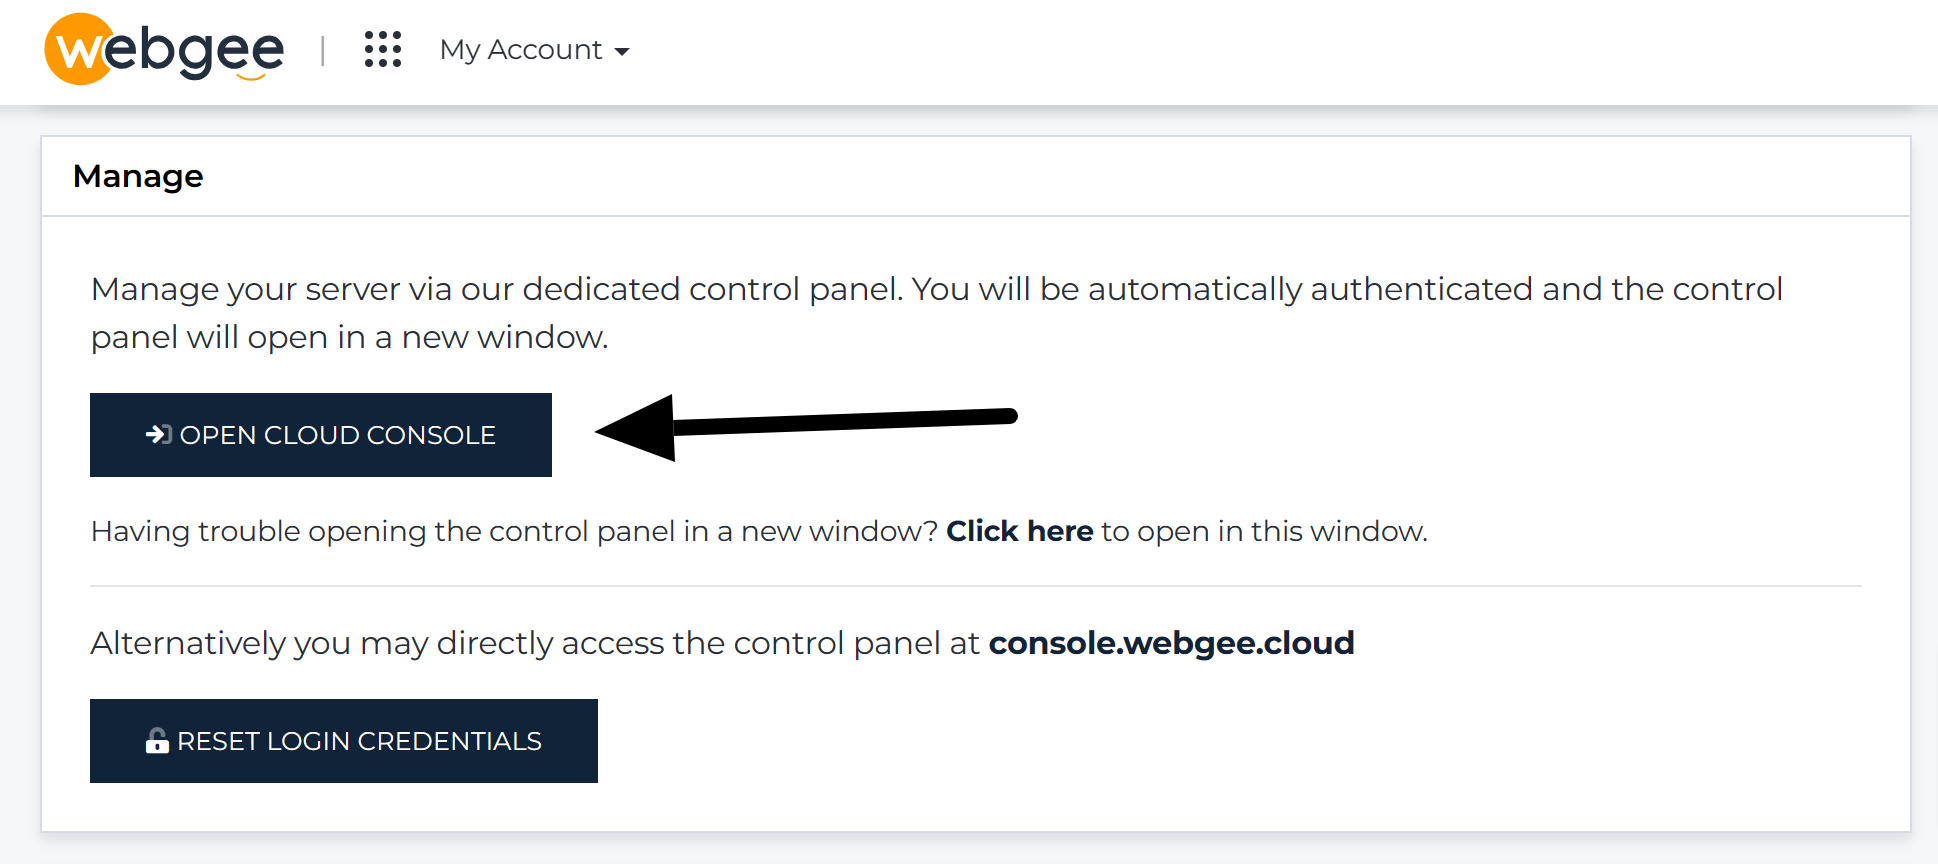
4. Opening Cloud Console
- In the "Manage" section, click on "Open Cloud Console."
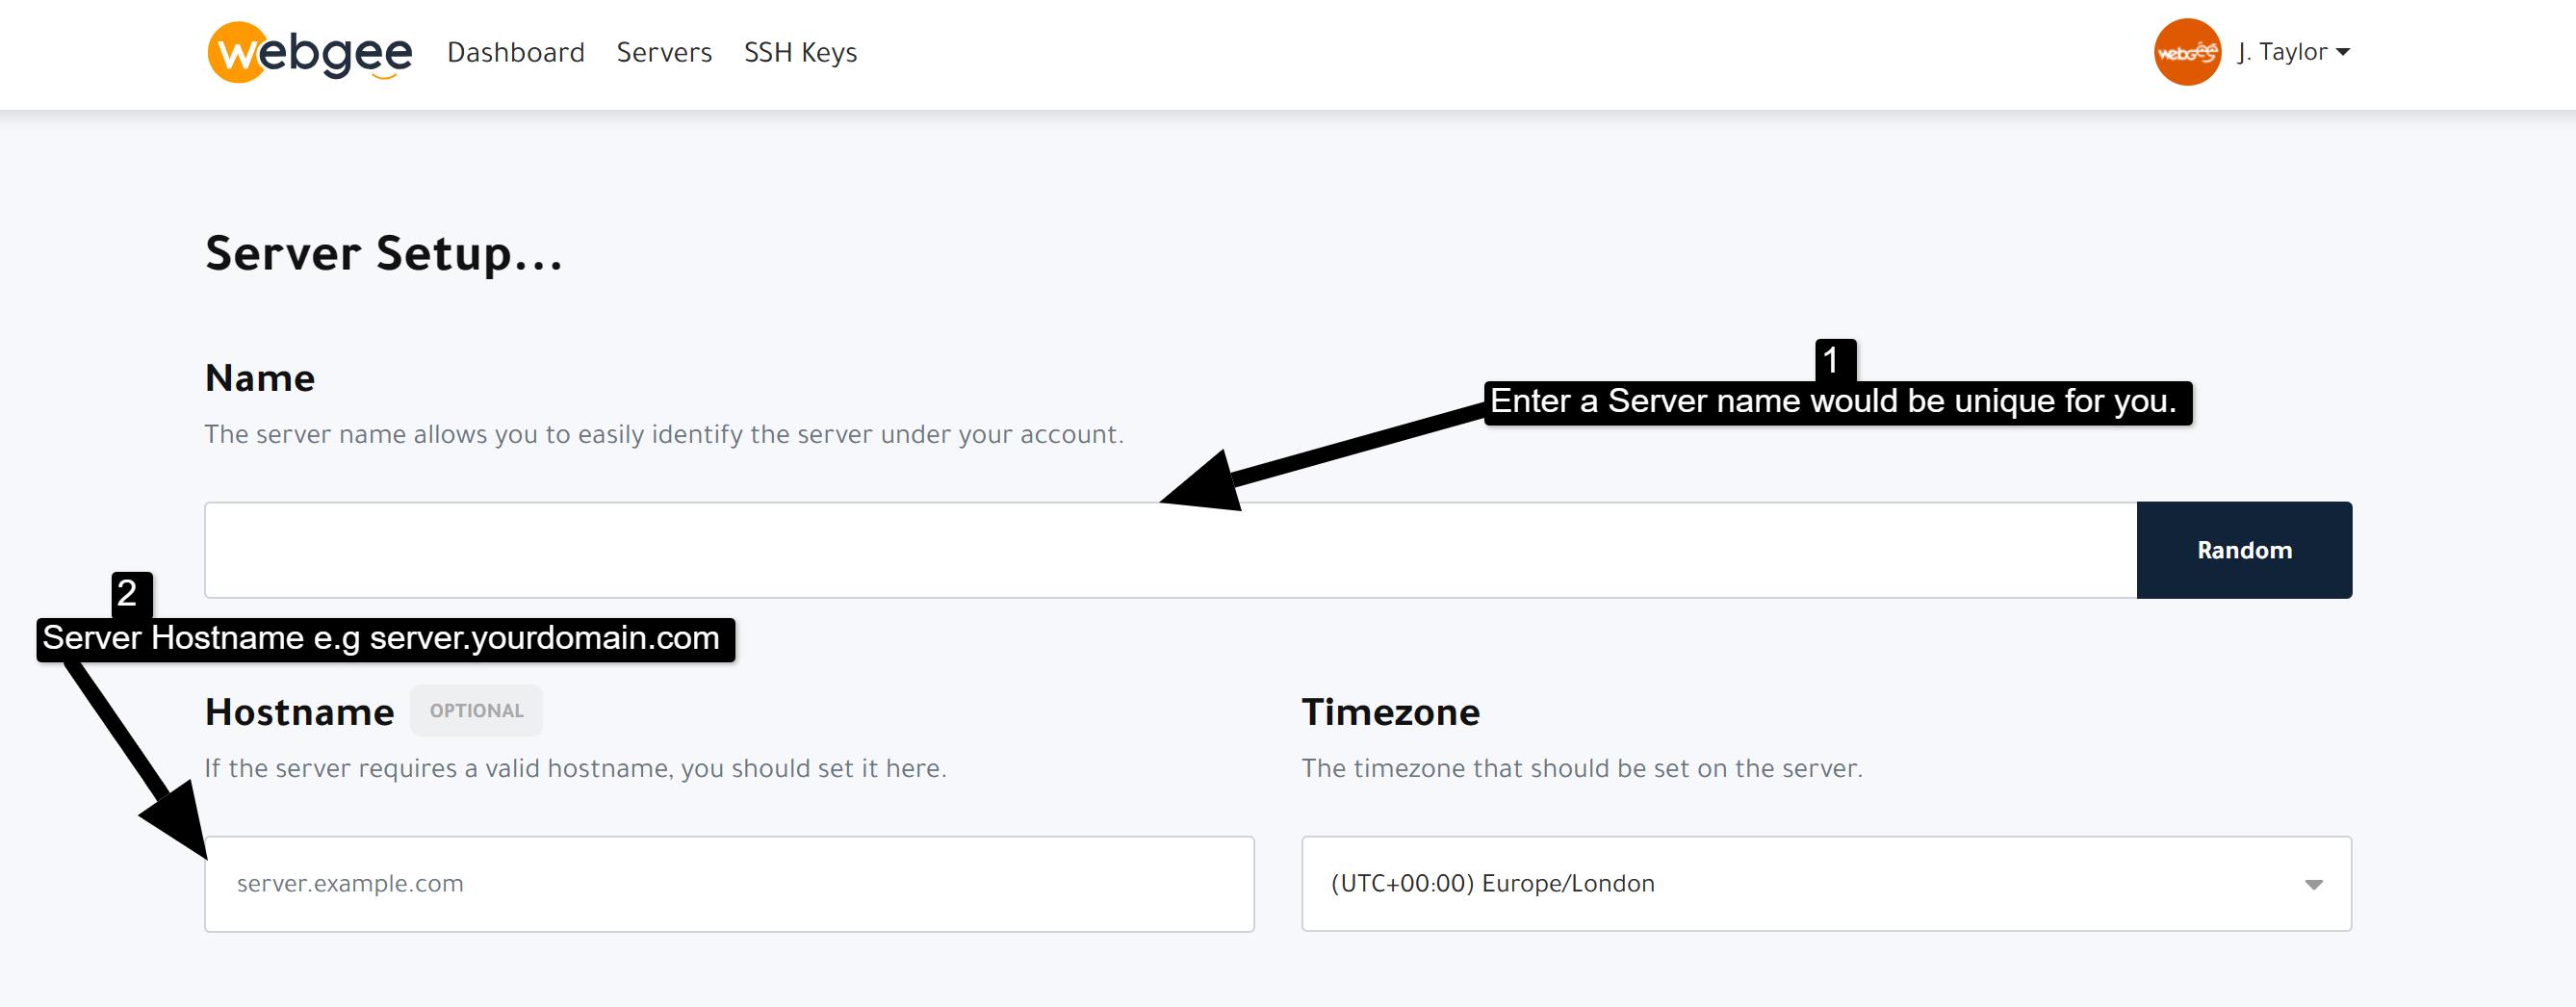
5. Server Setup
General Configuration:
- Choose a unique "Server Name."
- Set a distinctive "Server Hostname."
- Select your preferred "Server Timezone."
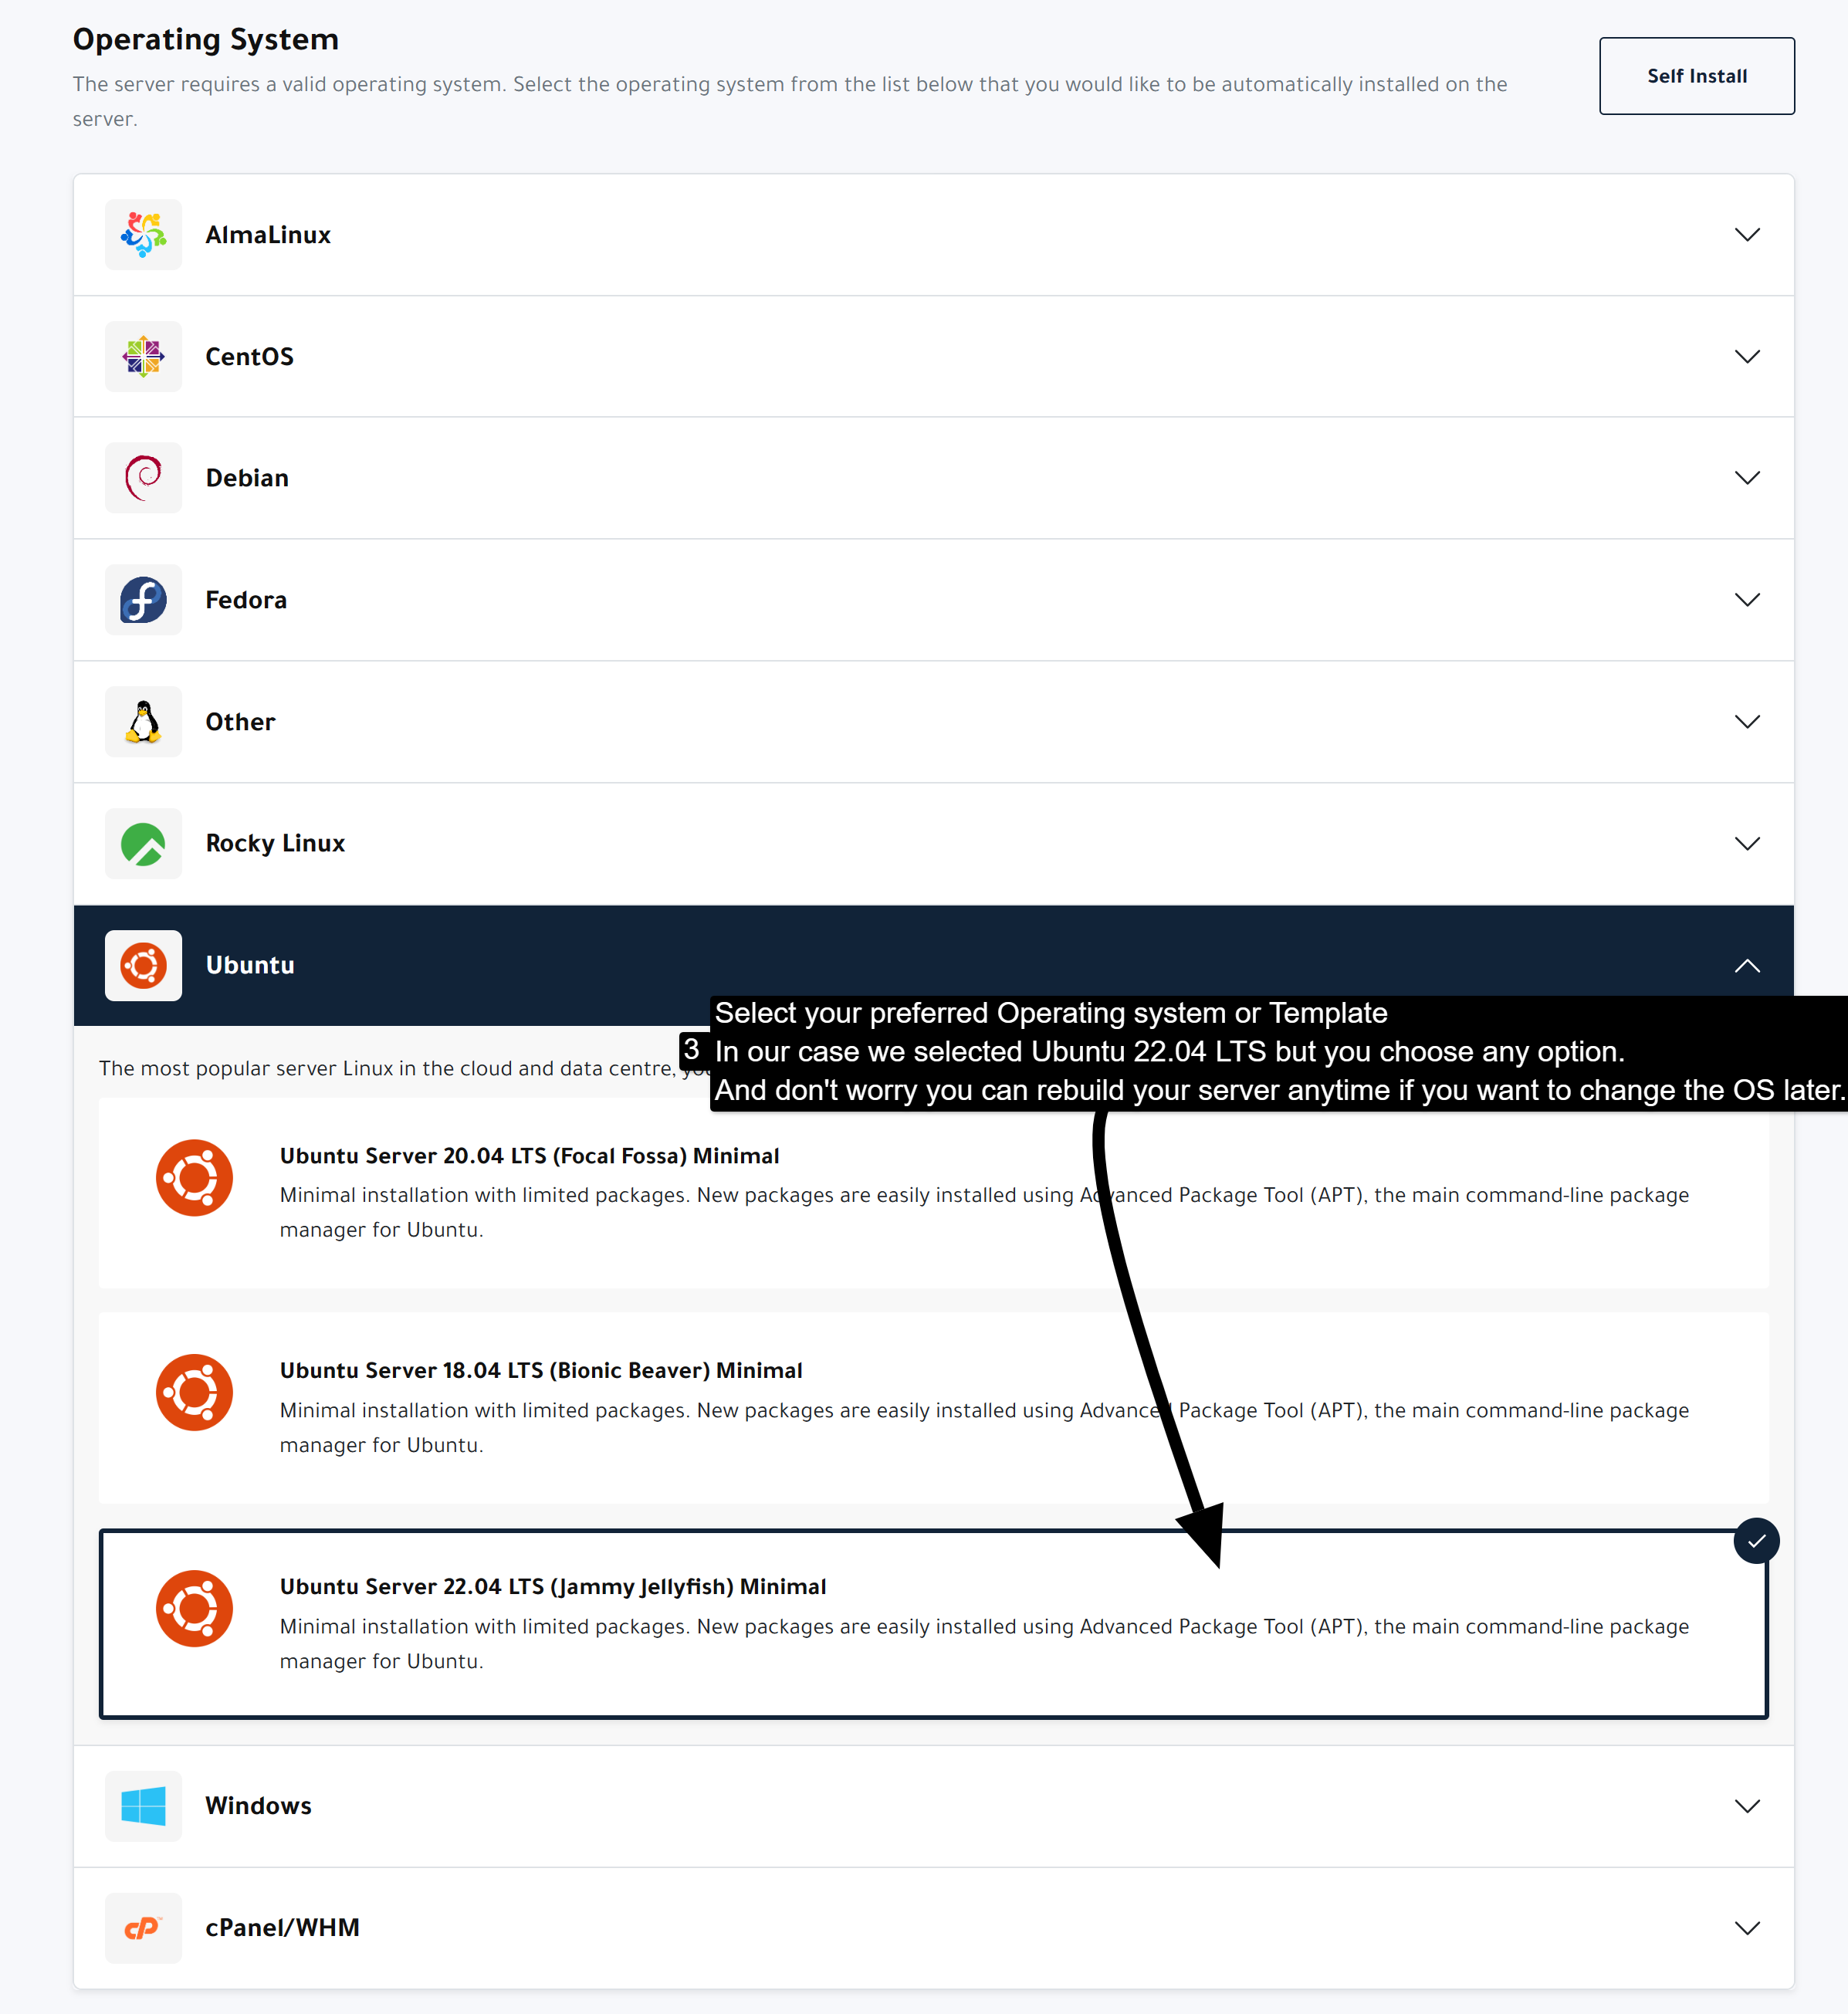
Operating System:
- Pick an operating system from the pre-defined templates.
SSH Key (Optional):
- Add a new SSH key or select an existing one.
- You can proceed without an SSH Key, and the server root password will be sent to your email.
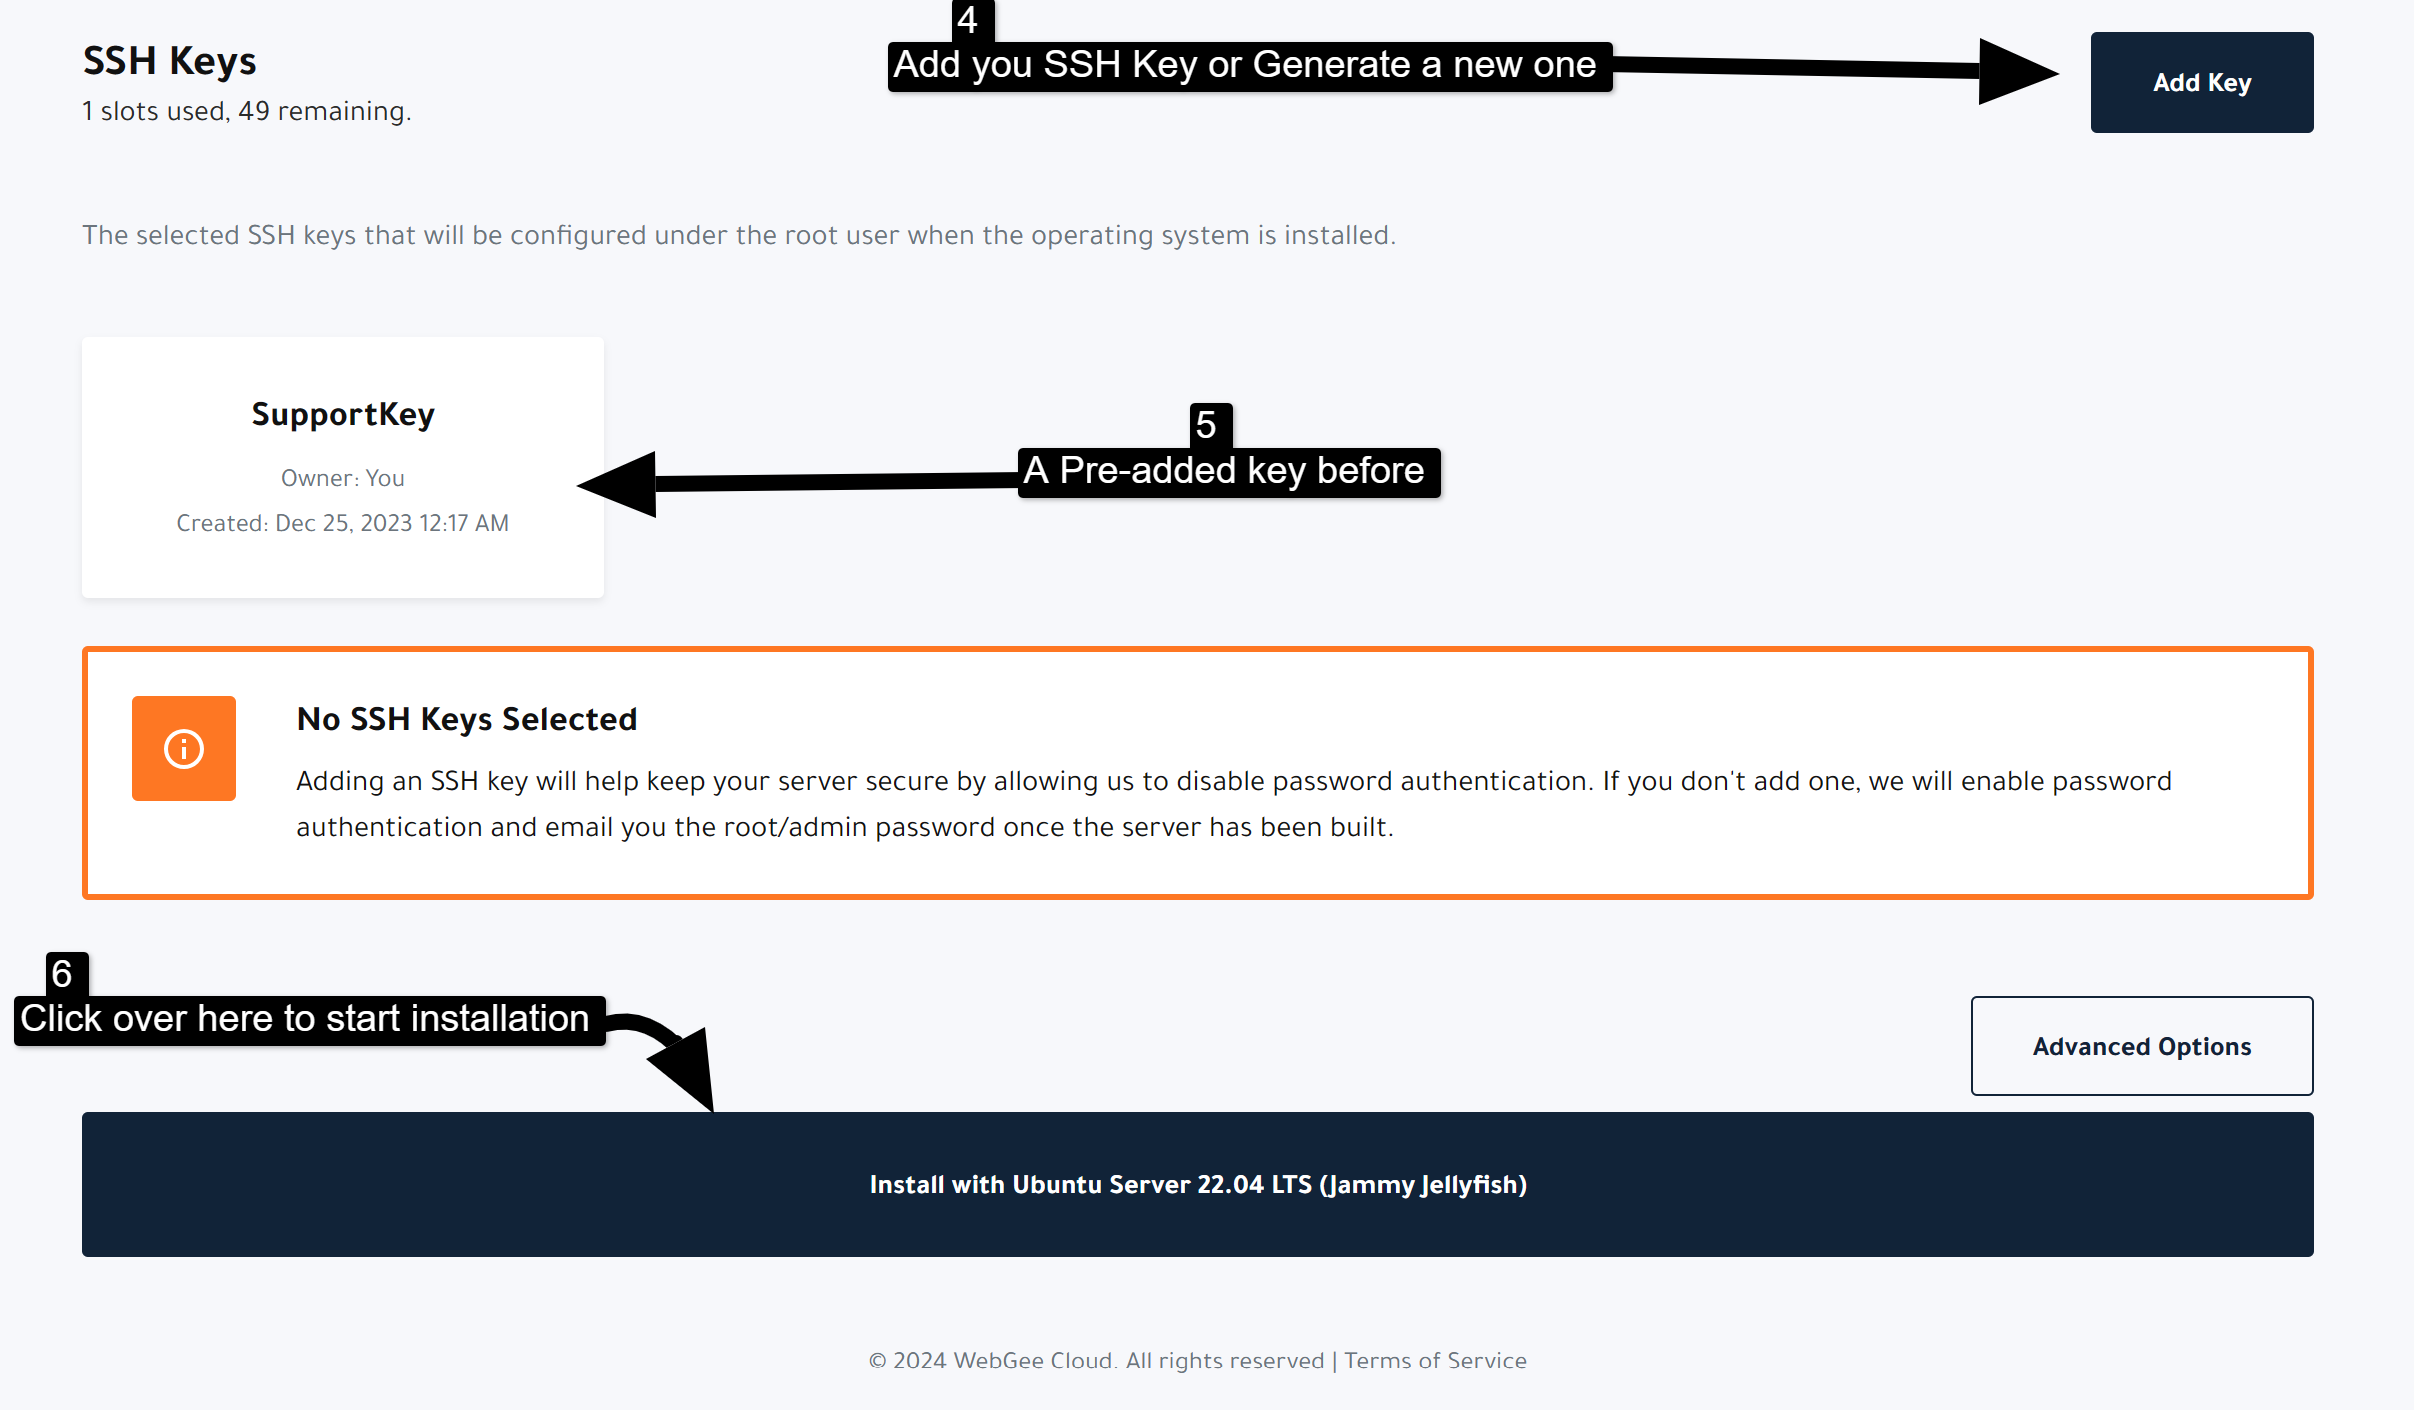
Installation:
- Click on the "Install" button at the bottom of the page.
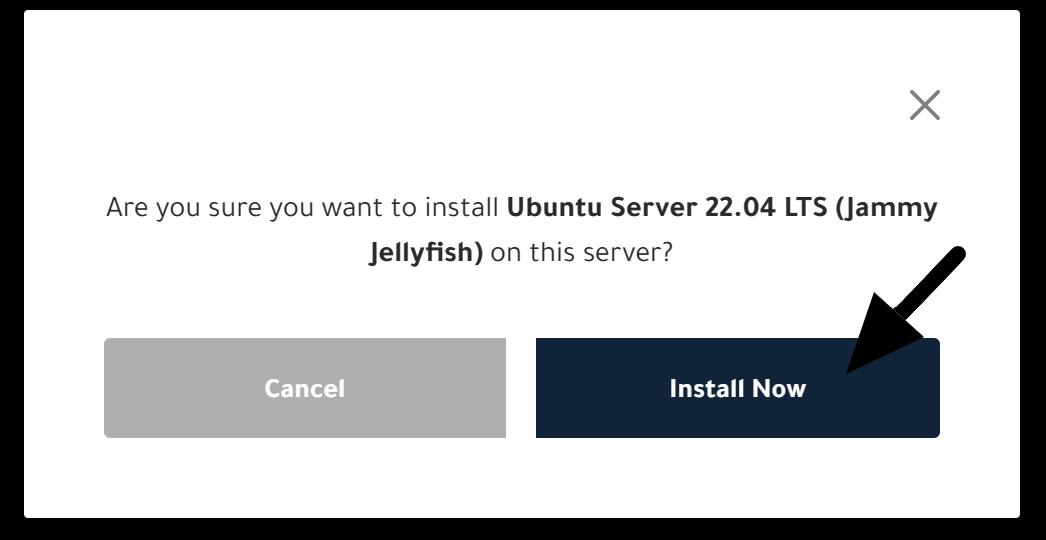
6. Confirmation Popup
- A confirmation popup will appear. Confirm the installation if no changes are needed.
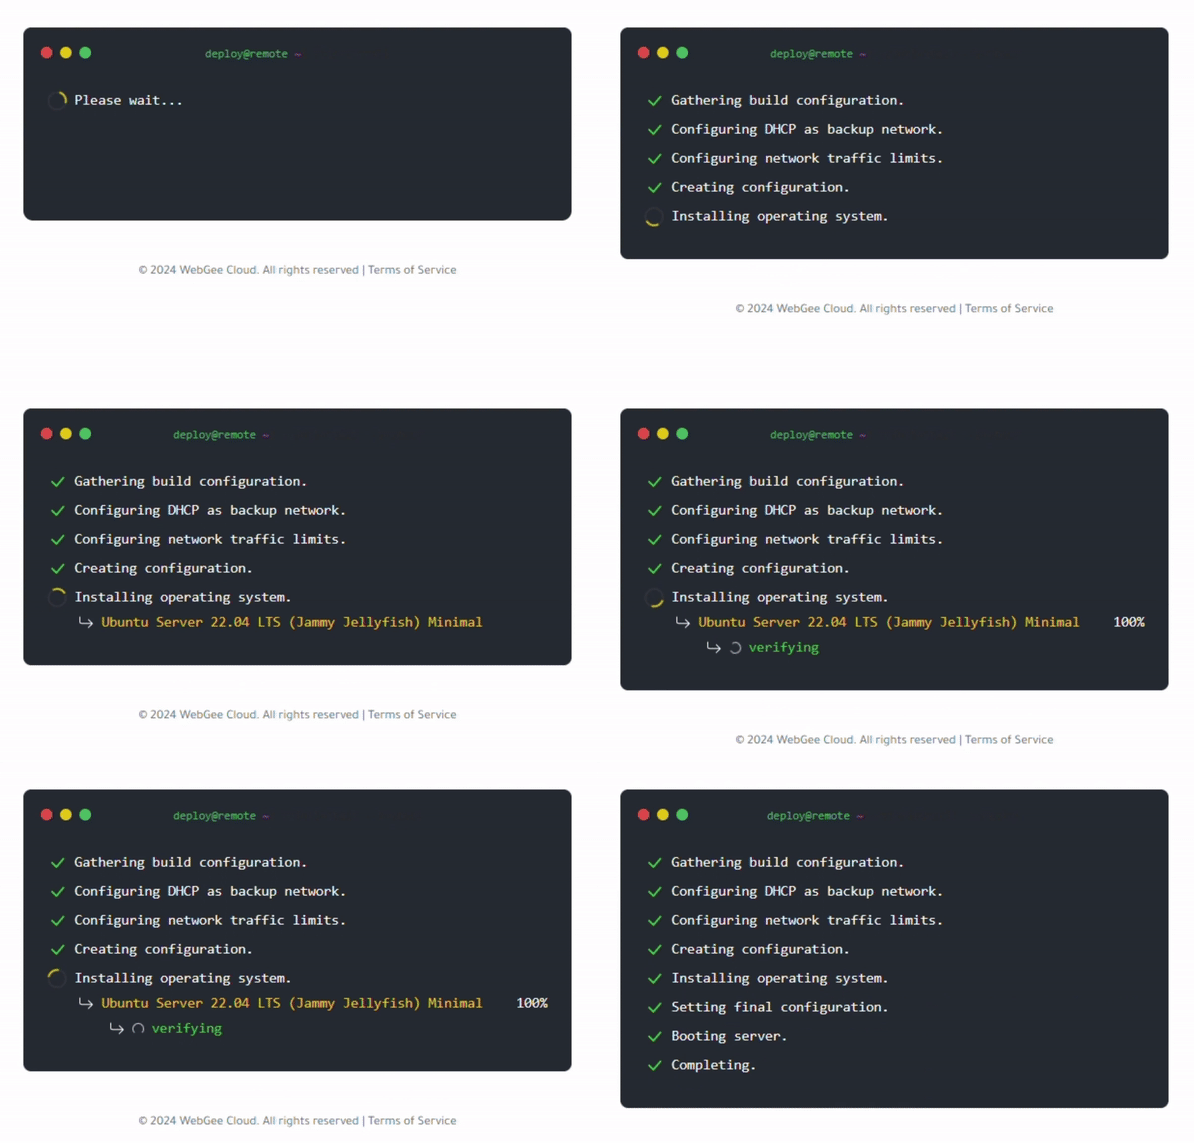
7. Setup Process
- You will be redirected to the setup page, which usually takes less than 20 seconds.
8. Server Dashboard
- After the setup is complete, you will be redirected to your Cloud Server dashboard.
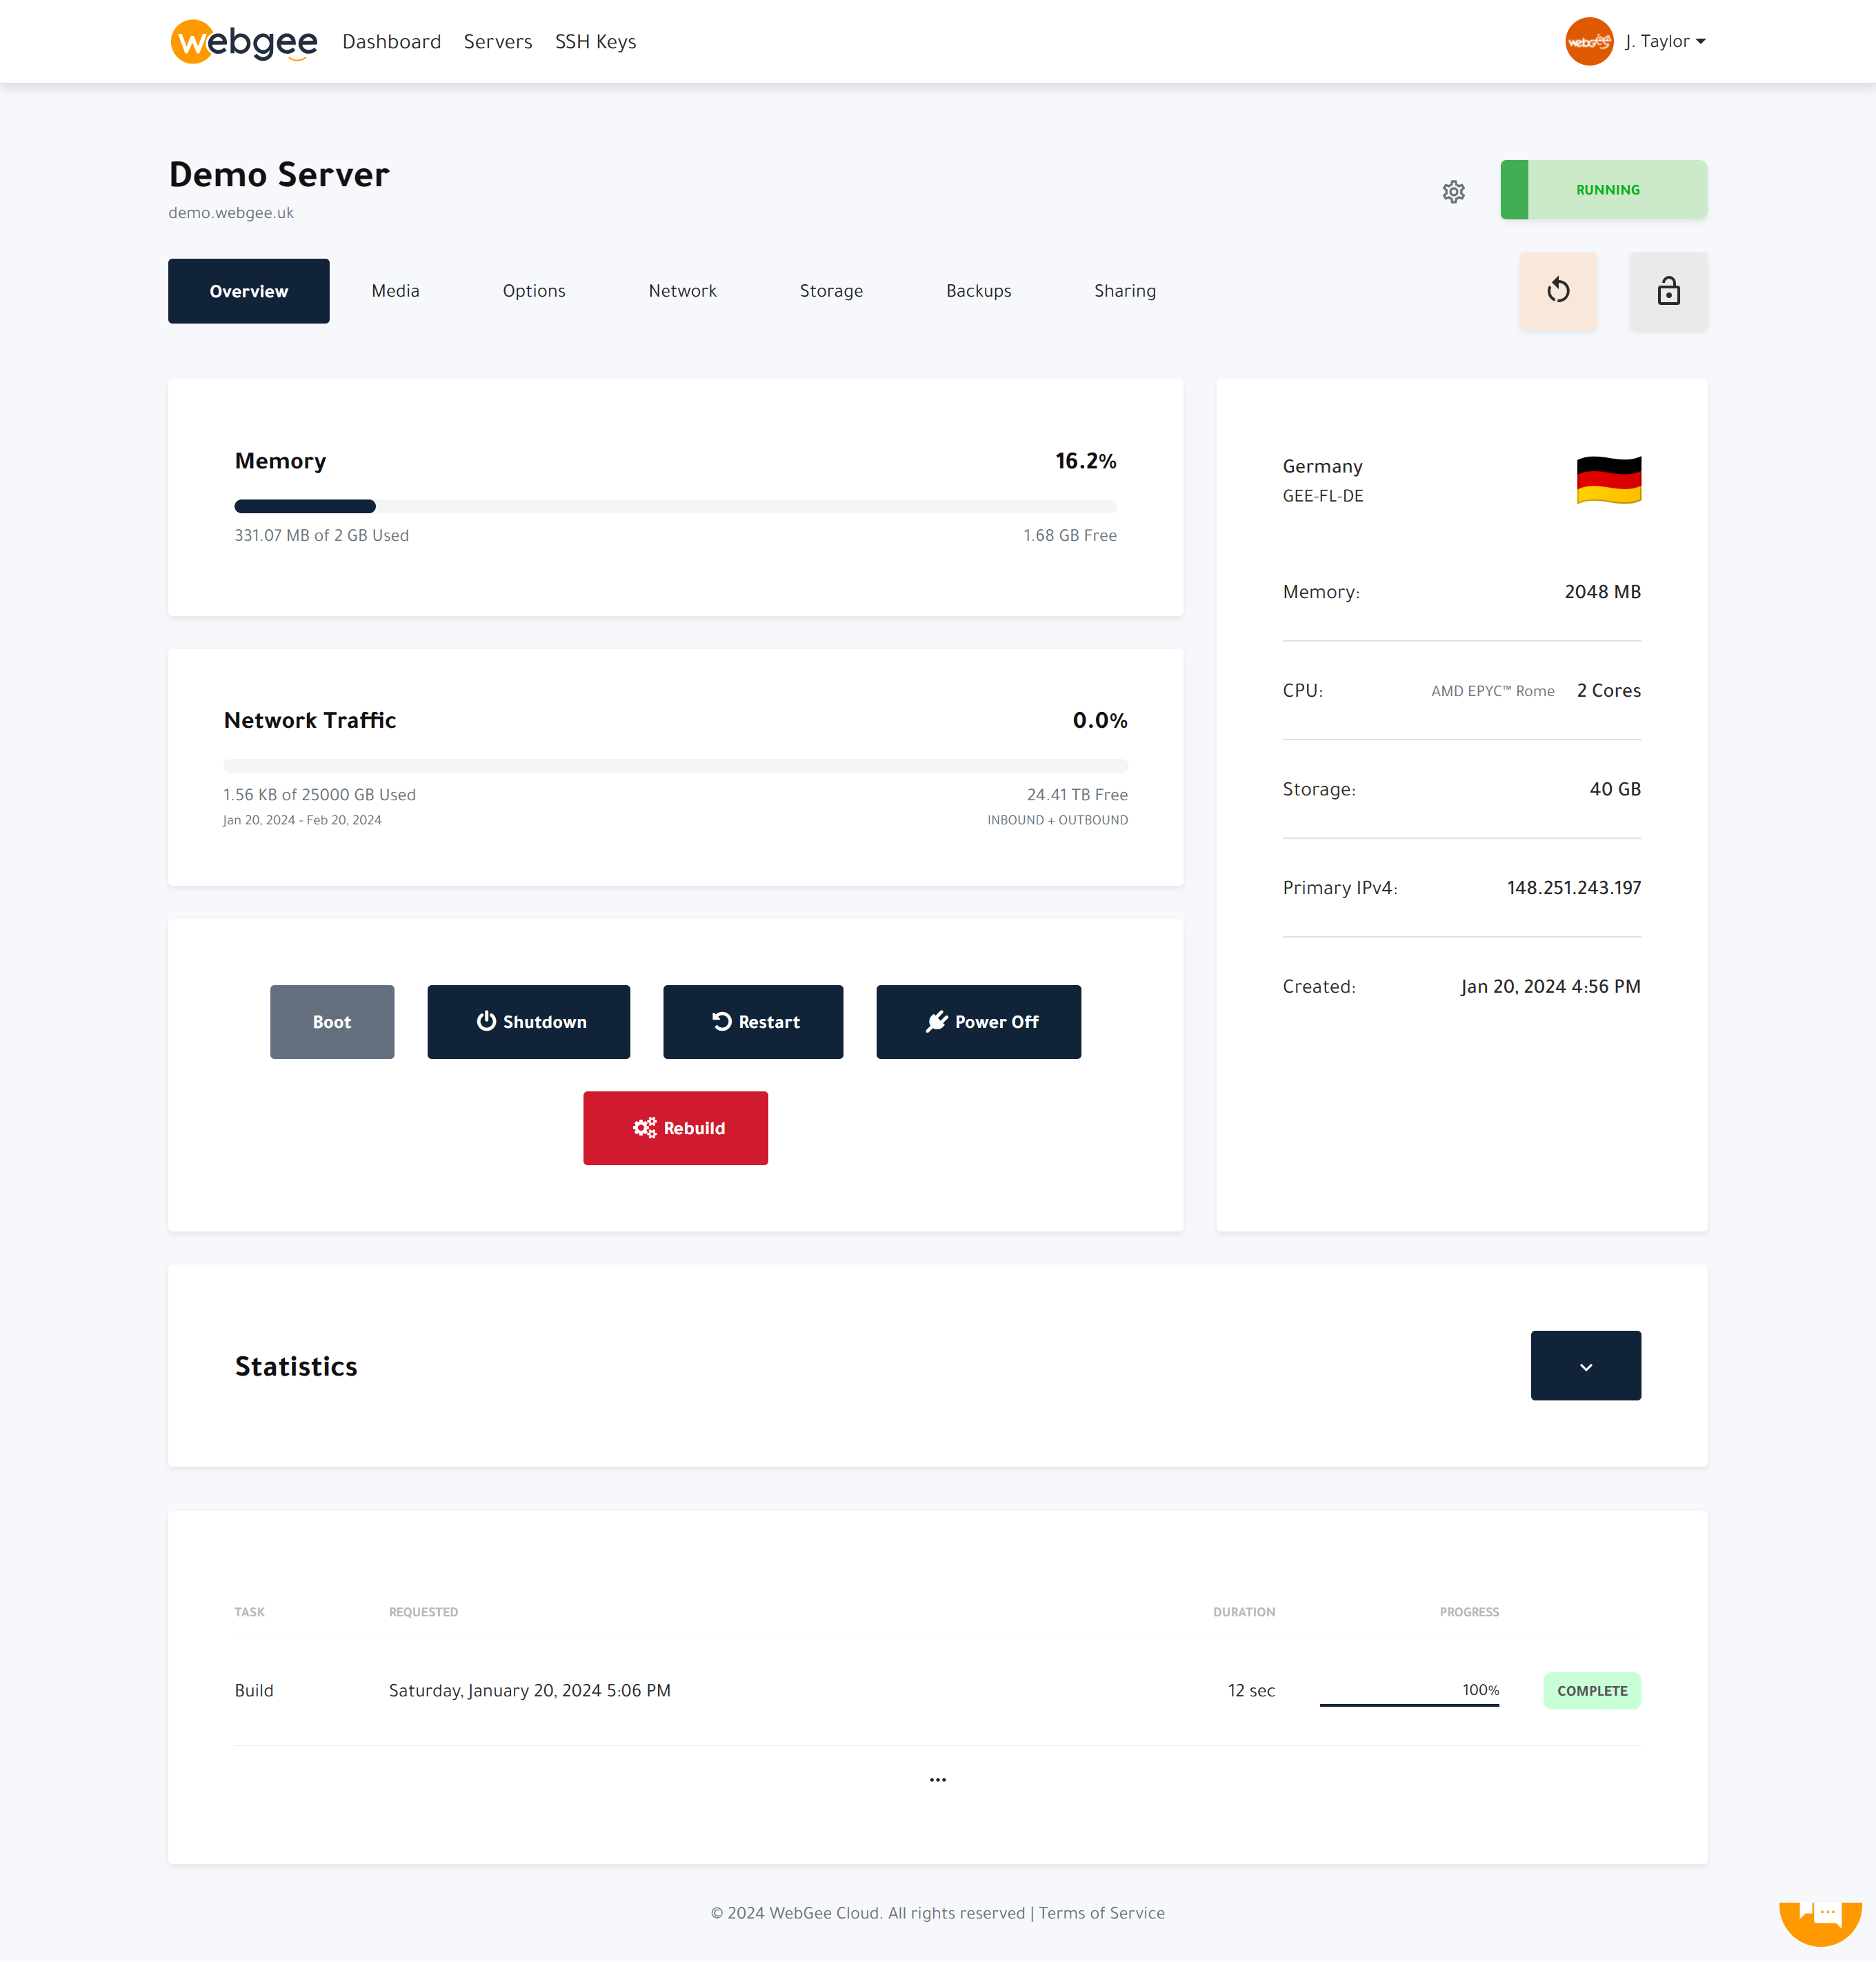
Congratulations! Your WebGee Cloud Server is now set up and ready to use.
If you encounter any issues or have questions, feel free to reach out to our support team.
Thank you for choosing WebGee as your hosting provider.
We wish you success with your Cloud Server!