In this article, we're going through enabling Redis Caching which is really useful to enhance your website time loading.
And if you're using Memcached, it would get affected as far as the fact that Memcached was no longer available. The Memcached extension was disabled globally, as it was deprecated from the service, so kindly switch to Redis for better performance and stability.
The first thing to do is to navigate to Redis in cPanel:
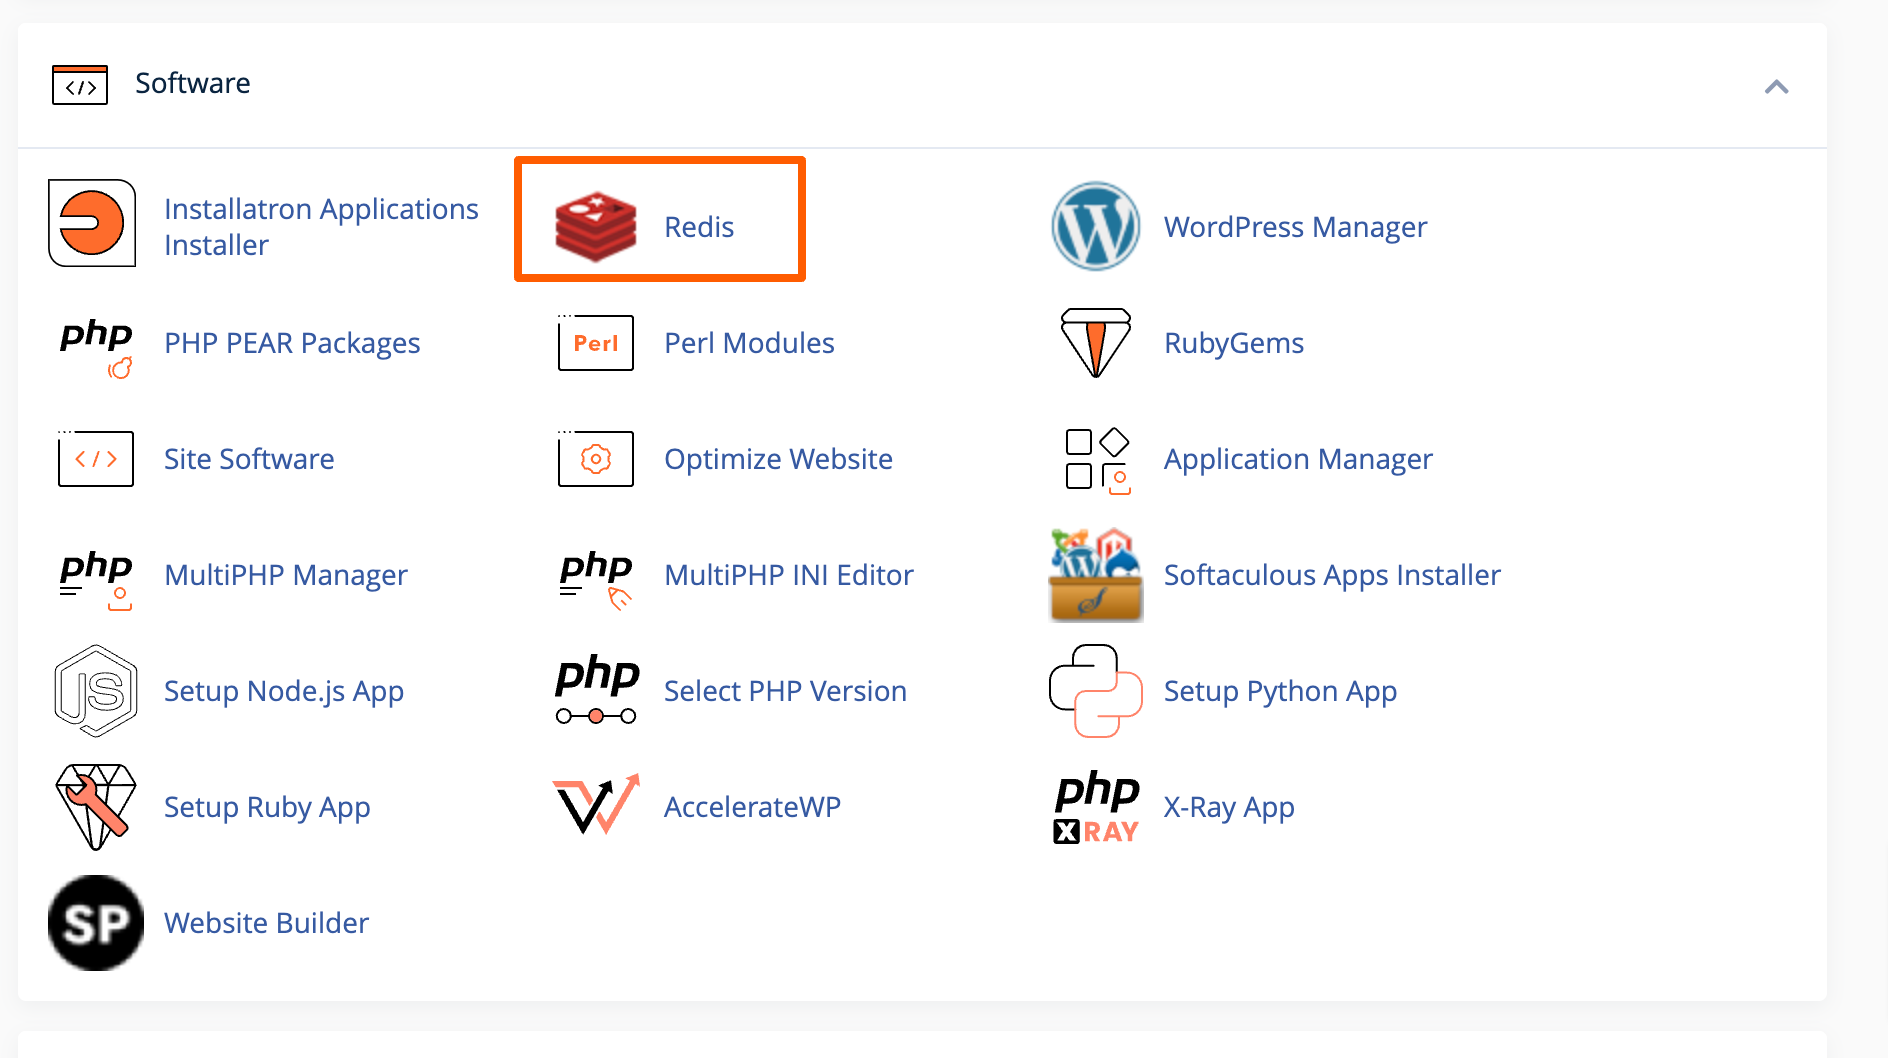
Enable Redis from cPanel for first time
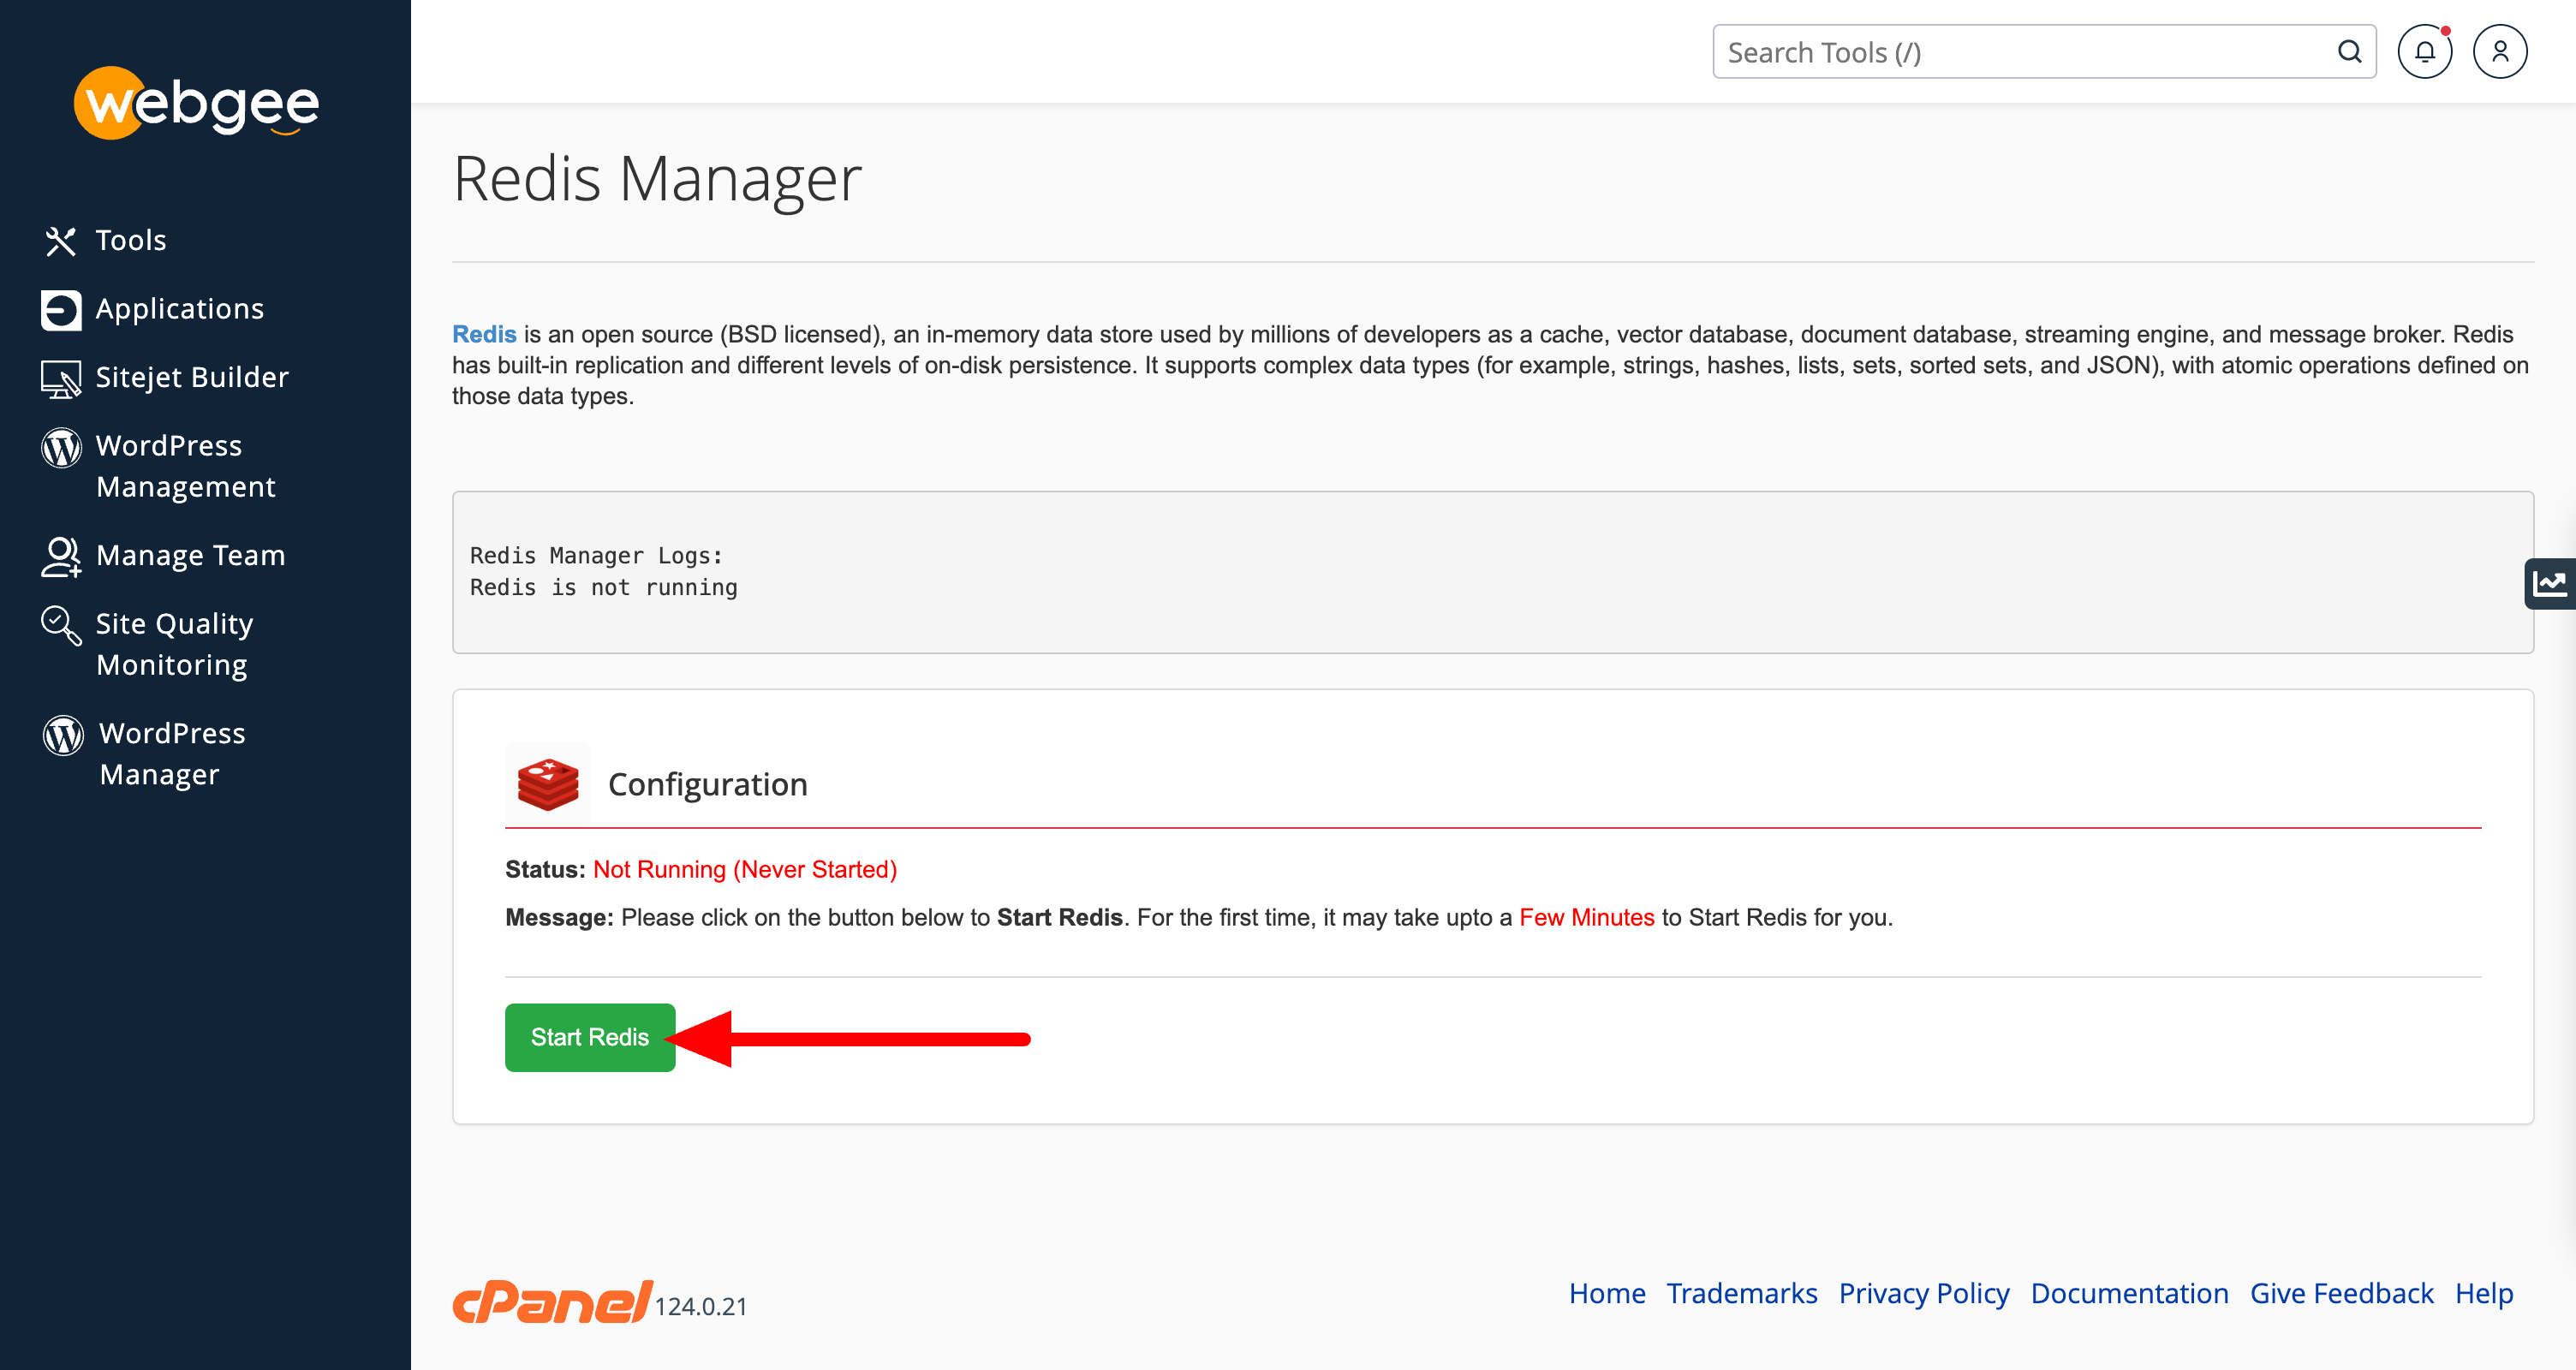
Copy Redis connection details
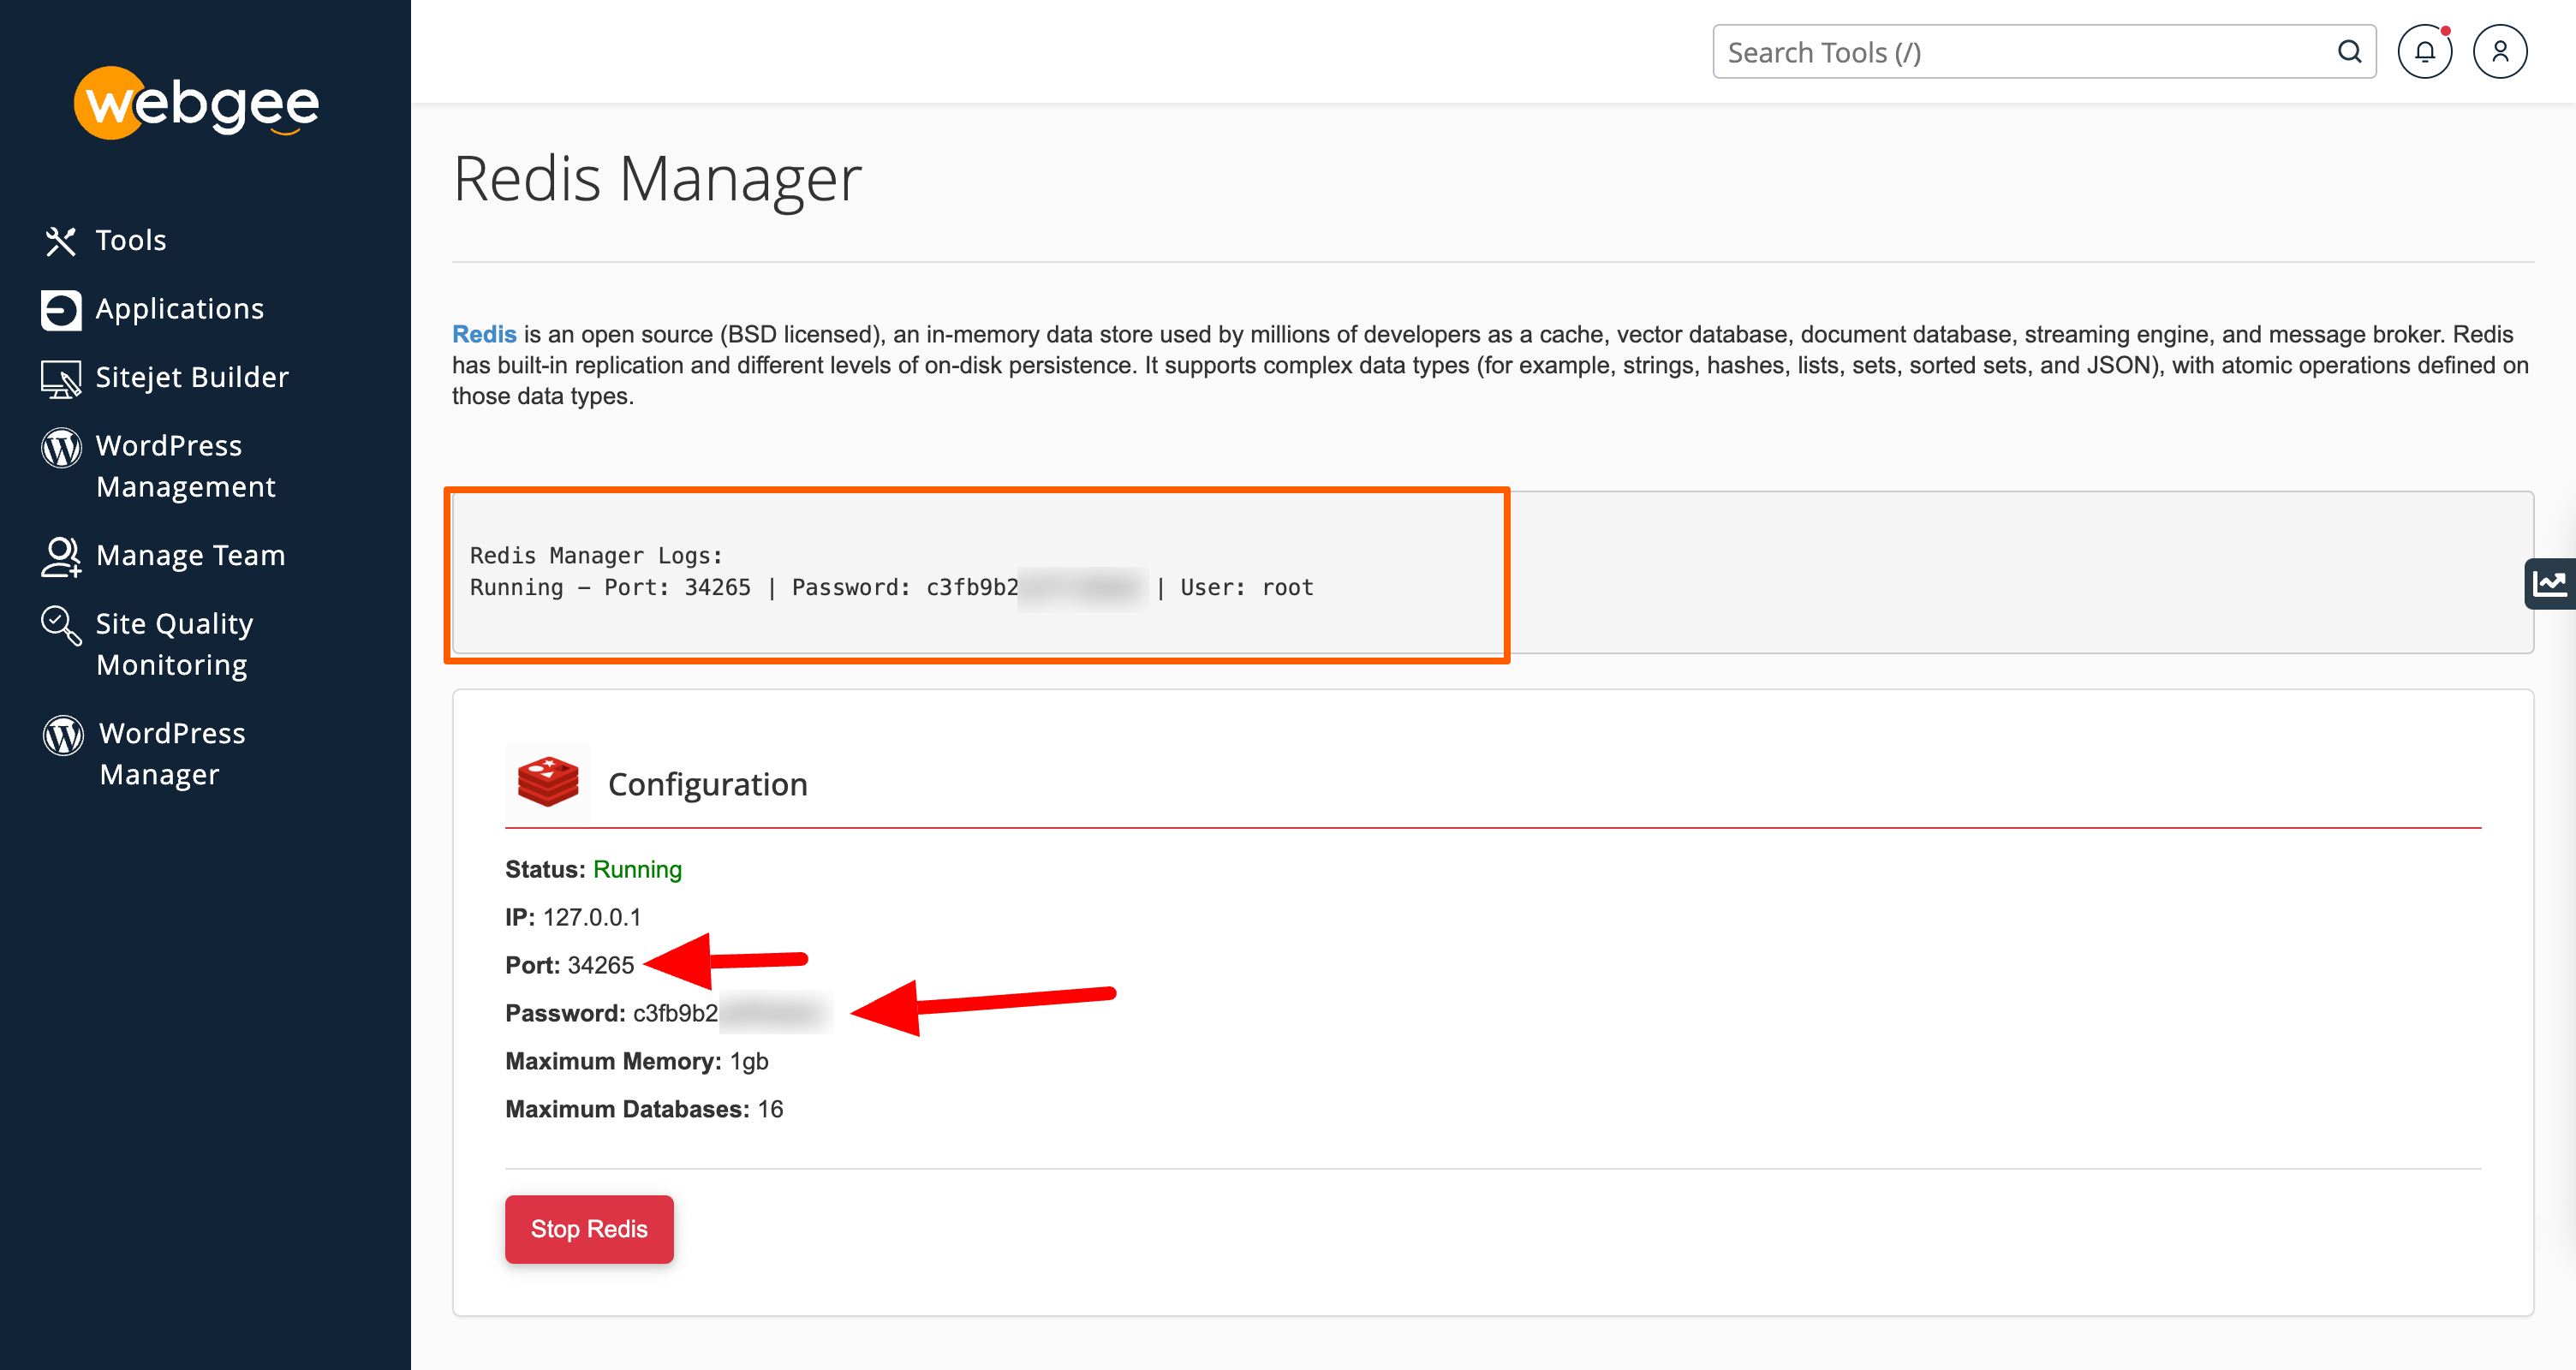
Once enabled copy the Redis connection details as we will need this later! You can always come back to this screen if you need to view this again.
Now we need to enable the Redis extension, this is enabled under cPanel -> Select PHP Version -> Extensions -> Redis
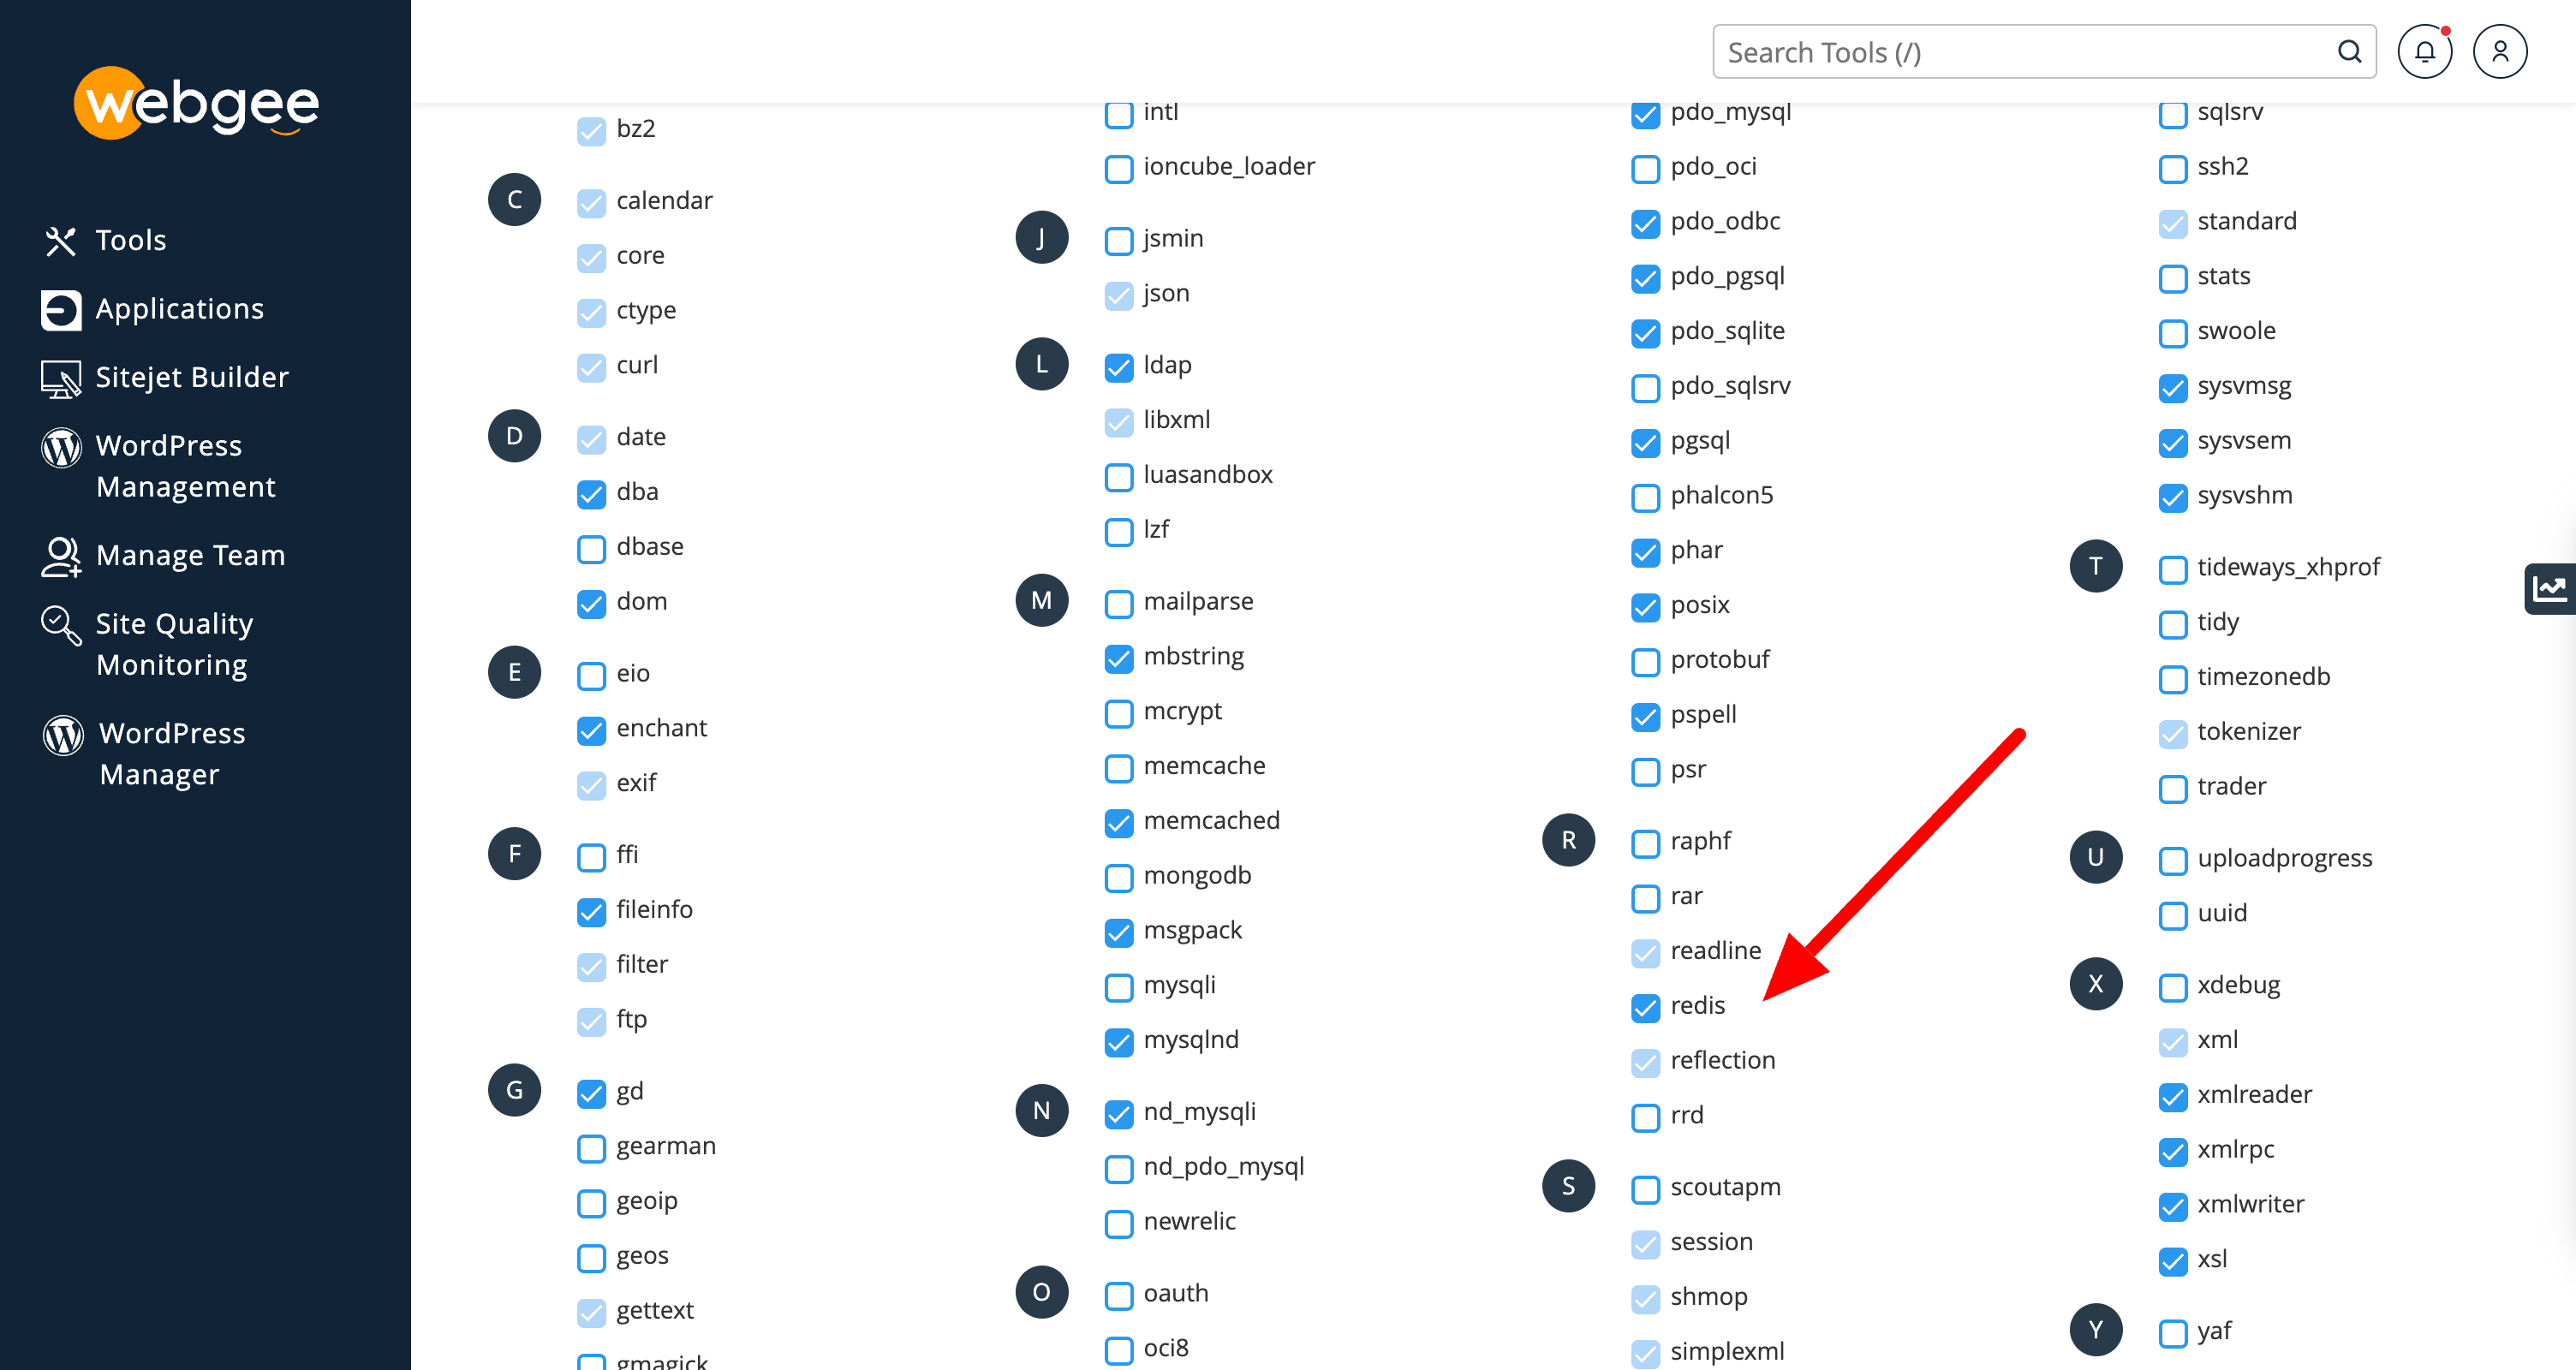
Once enabled we can log in to WordPress and access the LiteSpeed Cache.
Under Cache -> Object we can find the settings for enabling Redis:
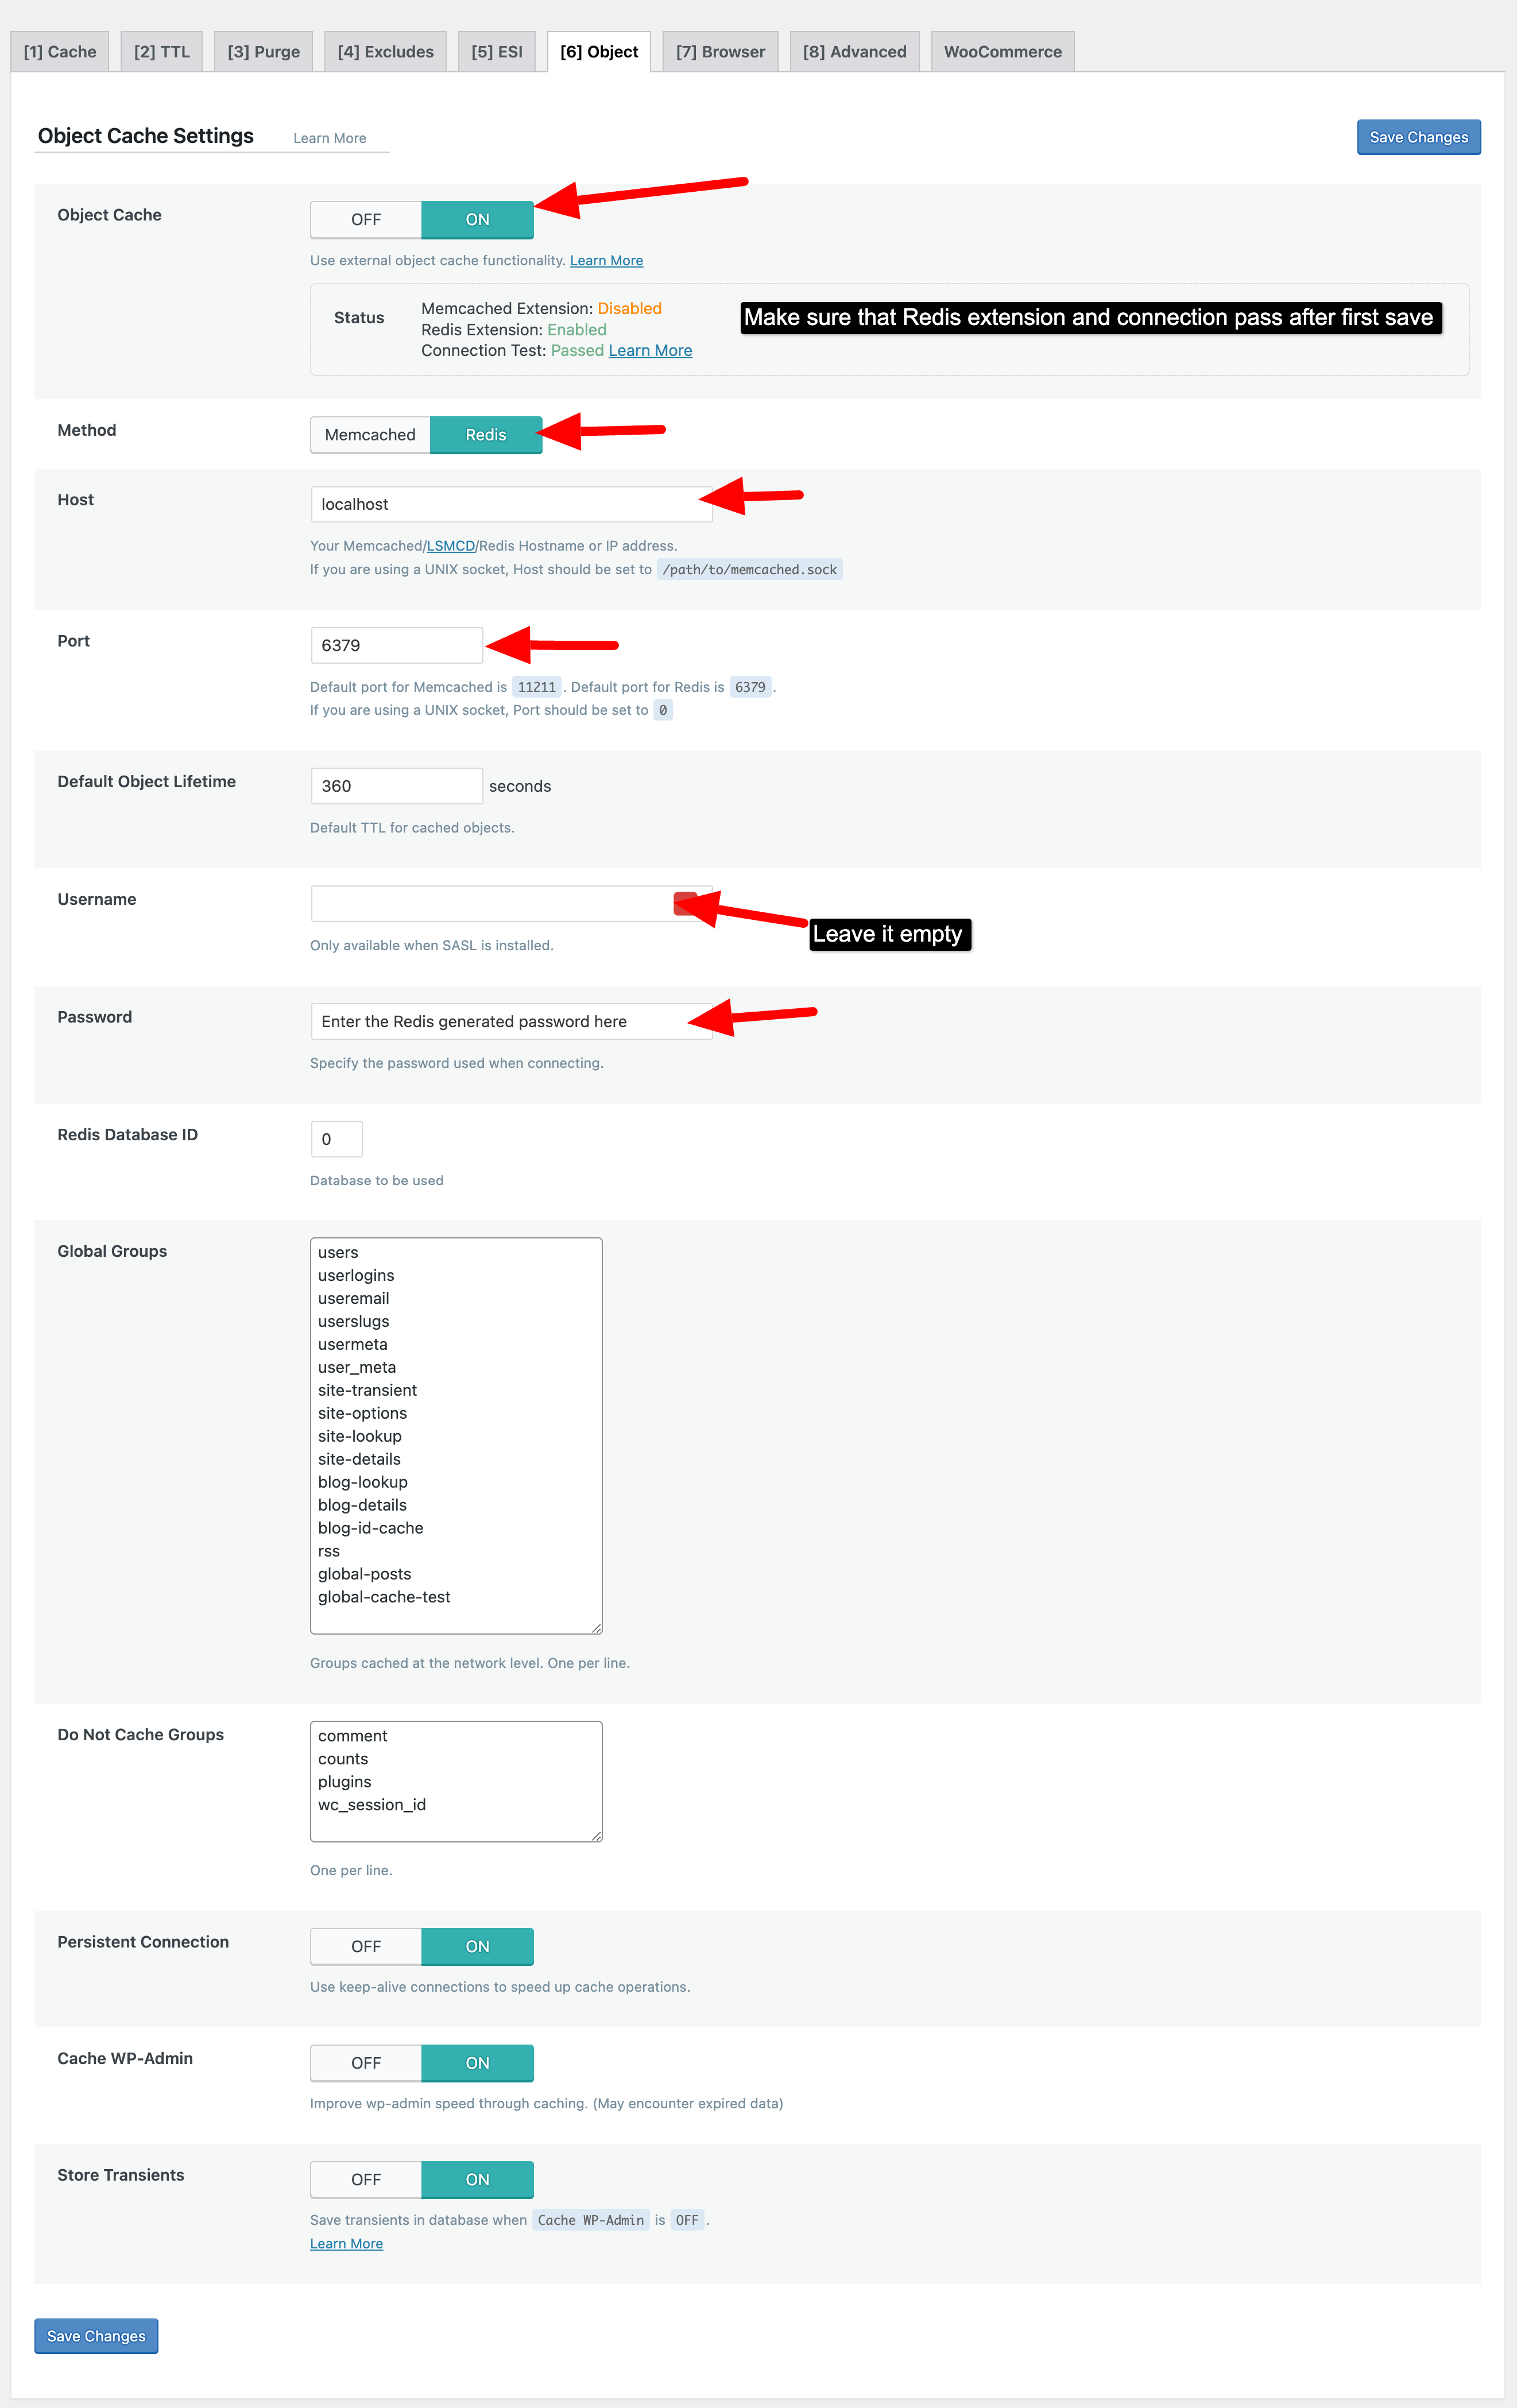
The settings we need to enable here are:
- Change Object Cache from Off to On
- Switch Method to Redis
- Set the Host to 127.0.0.1
- Change the port to (Port as shown in cPanel)
- Leave user empty.
- Password (As shown in cPanel)
Once done hit save and the Redis cache should be ready to go!